Long gone are the days of lugging around a DSLR to take gorgeous Instagram photos.
You can get the perfect Instagram shot by using what you already have on you at all times — your phone!
We’ve put together this handy guide to taking, editing, and sharing Instagram photos all from your phone. With our tips and tricks, you’ll be getting that A+ content in no time.
Step #1: Check Your Camera Settings for Higher Quality Instagram Photos
Before anything else, in order to level up your Instagram photos, you have to check your camera settings.
Most phone cameras are super-powerful, with a 12-megapixel front-facing camera and a ƒ/2.2 aperture, but the tricky part is learning how to use them.
So the first rule of Instagram photography is to always look at what you’re working with before you begin shooting.
#1: Turn HDR Off
HDR — or High Dynamic Range — is a feature on both iPhone and Androids and it’s basically there to help you take better-looking photos.
It takes a few of the same photo at different exposures and puts them together in one, so the final photo has a ton of detail.
If you’re confident in working with HDR, it can be awesome. But, it’s hard to get right and can sometimes actually make your photos look unnatural and off.
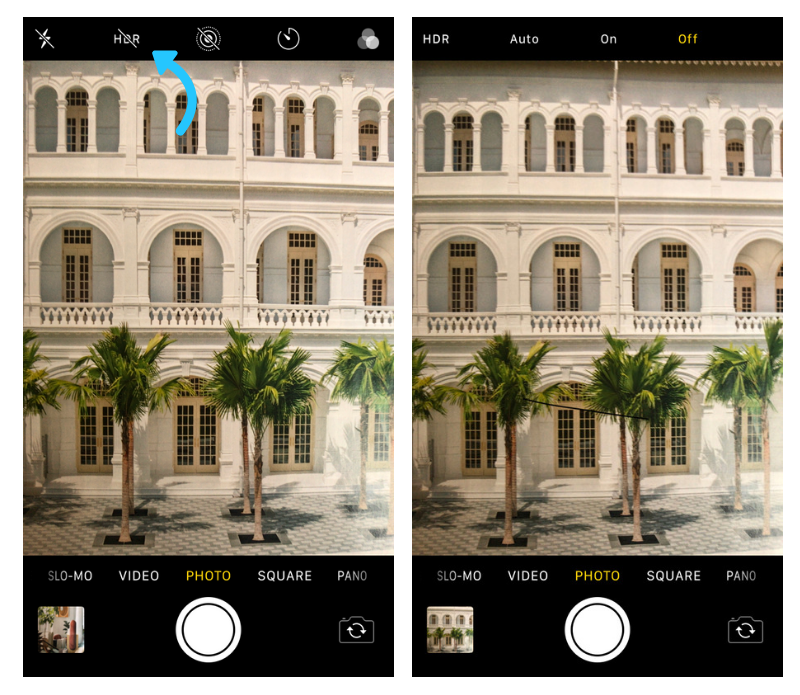
To make things easier, let the camera do the heavy lifting and turn your camera’s HDR setting off. You’ll still get high-quality images without the need to think too deeply on your exposure levels.
#2: Check the Photo Mode
There are so many different settings on phone cameras these days that sometimes it’s hard to know what settings are useful and which ones aren’t.
One popular photo mode is “portrait mode”, which automatically detects a well-lit subject within a certain distance from the camera and creates a bokeh effect (depth of field).
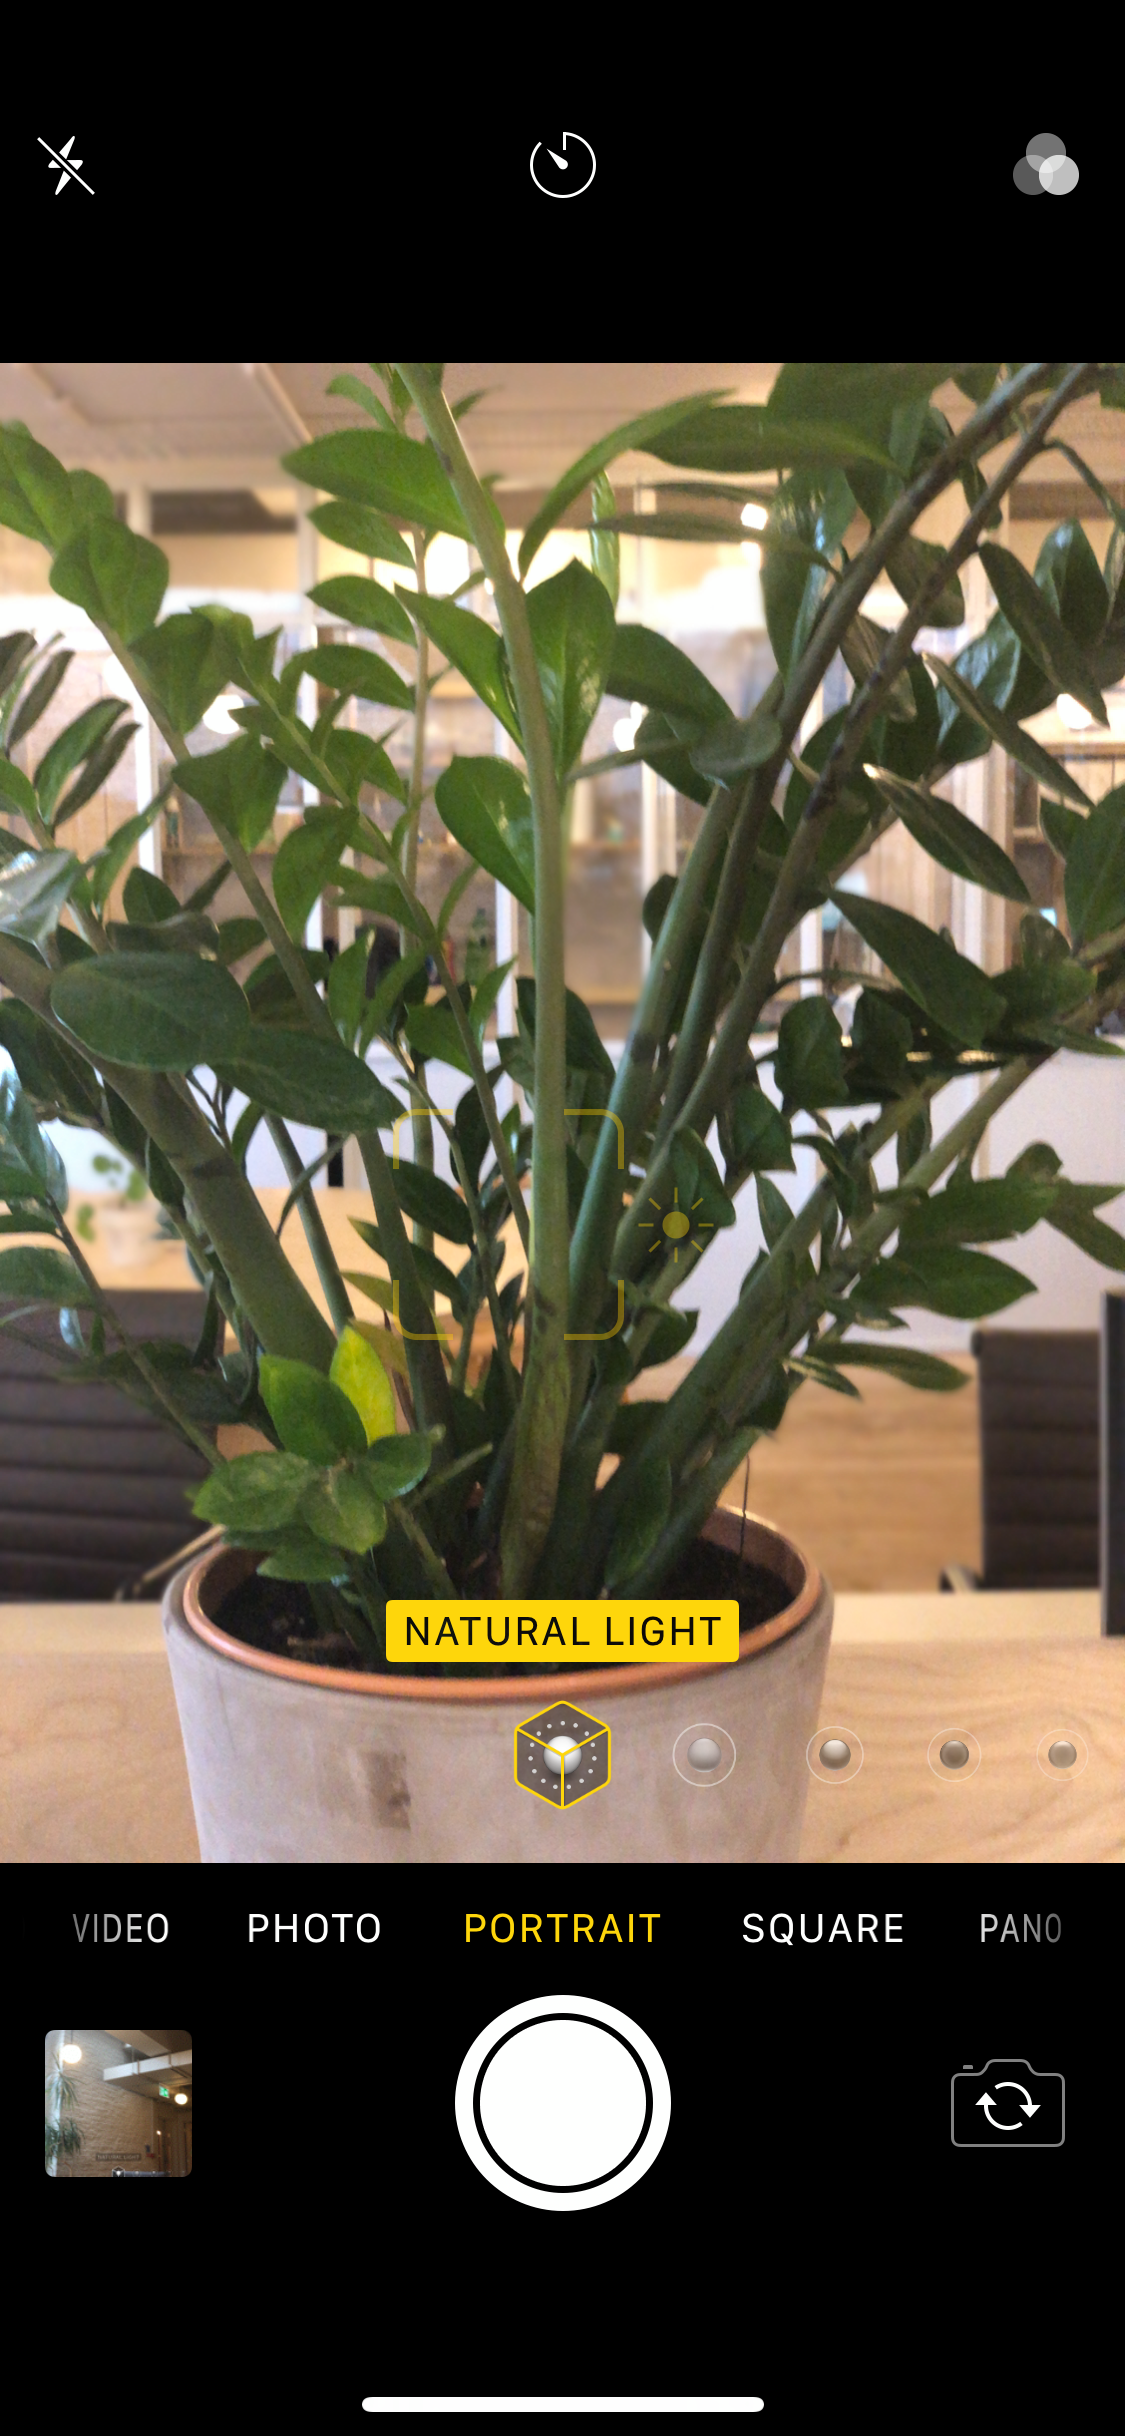
Portrait mode is great when you’re taking — you named it — portraits. But that’s not all it’s good for! Many bloggers and influencers use portrait mode for food or product shots too!
Now, let’s talk about the photography pitfalls — portrait mode isn’t great when you’re shooting inside or in low light.
This photo mode also requires a subject that is still. For example, if you’re shooting someone jumping or walking, you’re going to want to turn off portrait mode and switch to another mode.
But don’t let that dishearten you, portrait mode should still have a place in your photography arsenal — just be selective on when you use it!
TIP: If you’re using an iPhone and are shooting a moving object like someone posing against an Instagrammable wall, try shooting in live photo mode or holding down the shoot button to enable burst.
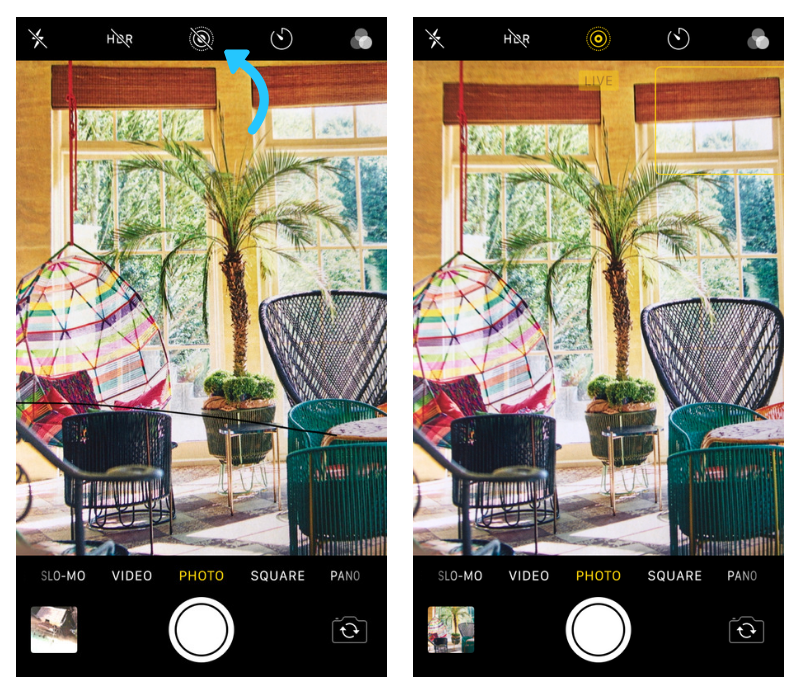
With burst, your iPhone will shoot up to 10 photos allowing you to sift through and choose the best one after.
Don’t worry, if you’re using an Android, you can also enable the burst feature by holding the shutter down.
Step #2: How to Capture the Perfect Instagram Photo on Your Phone
#1: Understanding Depth of Field
Creating DOF (or depth of field) with your phone camera is a really cool way to up your Instagram photo game.
It’s not too difficult and once you get the hang of it, your followers will be asking what camera you use to take your photos!
Let’s say you’re taking a picture of a person facing the water and you want the person in focus and the background blurry, tap your subject and wait for a yellow square to appear (if using an Android, tapping the screen to focus works too!)
Where you see the yellow square shows who/what is in focus. You’ll have to move around to get that perfect DOF.
The best photos take trial and error, but we’ve no doubt you’ll find your mojo soon enough.
#2: Get Your Composition Right
Gorgeous Instagram photos direct viewers to the subject of the photo while capturing an emotion or a story.
When you’re taking a photo with your phone camera, the composition is what will help your picture go from “good” to “great”.
So, how do you get the composition on point? With something called the rule of thirds.
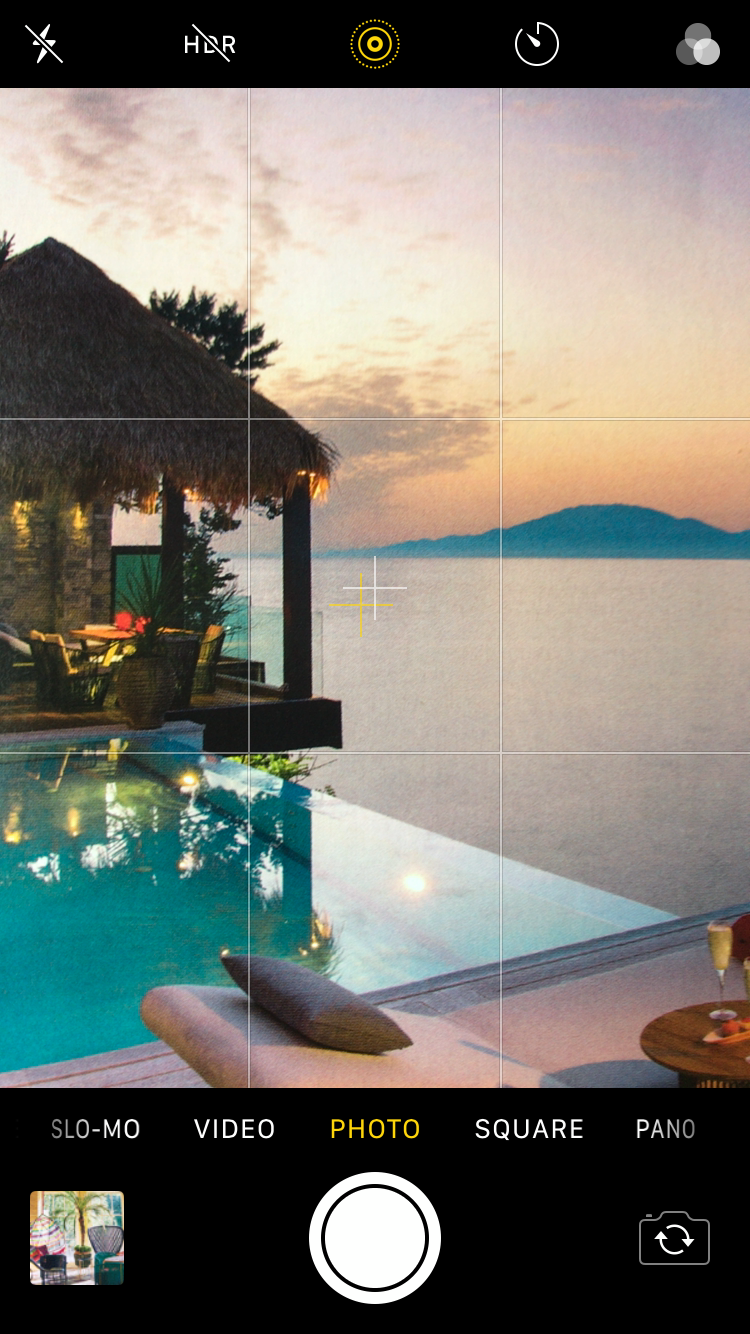
Known as the golden rule of photography, the rule of thirds helps break down your image into (you guessed it) 3 portions or sections.
The goal is to put the most interesting aspects of the photo in the intersections of the grid to create a balanced and natural-looking photo.
If you can’t imagine the grid yourself, both iPhone and Android cameras have an option to turn the grid on when shooting.
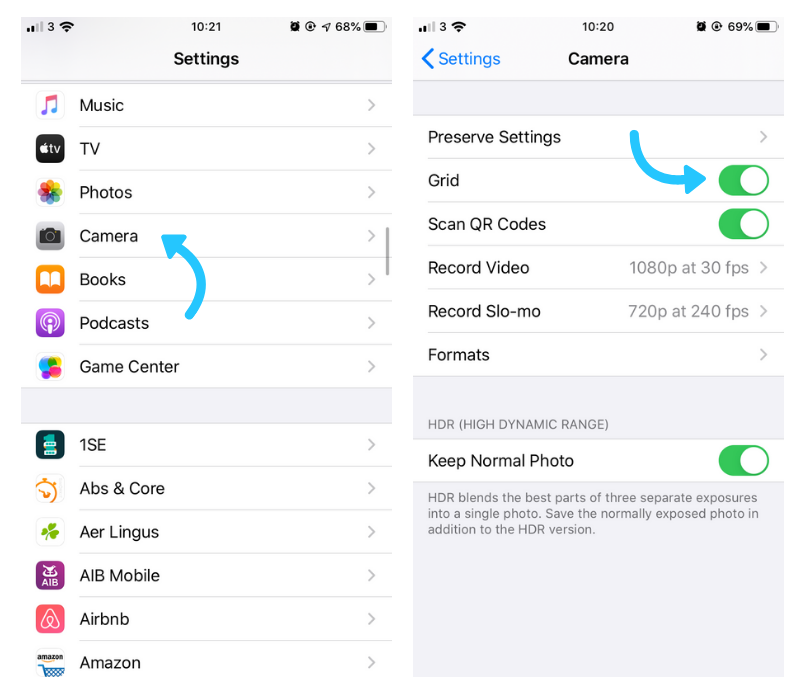
Note: If you’re working with an Android phone, go to your Camera Settings, and select Grid Lines
Like any rule, they are made to be broken, right? You don’t need to follow the rule of thirds when taking Instagram photos with your phone camera. But it’s just there to help you as a guide if you need it.
#3: Think About Lighting and Exposure
You know when you take a photo outside you’re excited to post it, only to realize later that it’s totally overexposed? It can happen to the best of us!
One of our favorite photography hacks is to combat this: underexpose your camera!
When you’re shooting, it’s always better to have an underexposed shot to fix in post, rather than having a blown-out photo.
This is super easy to do on both iPhone and Android. If you’re using an iPhone, tap your phone screen when you’re taking the shot and wait till the yellow box appears.
Once it’s there, move the little sun on the right of the box and you’ll see the exposure lowering and keep moving the yellow sundown until your liking.
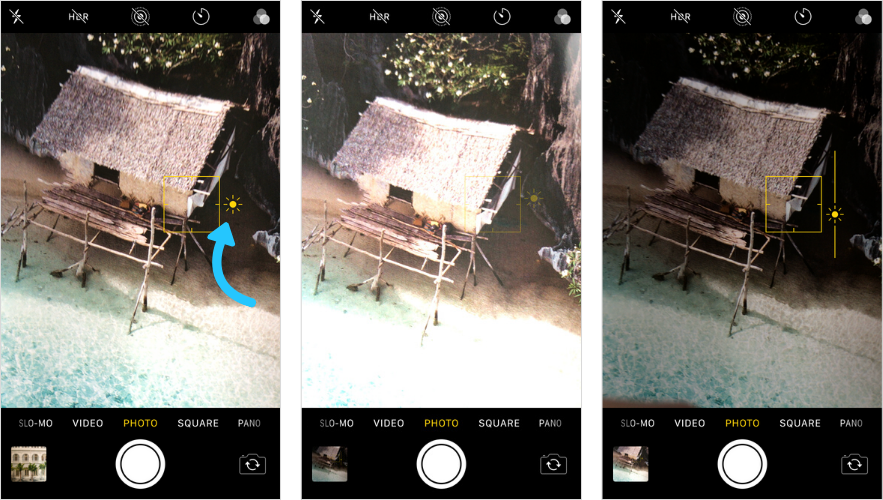
It’s basically the same deal on Android — just tap the screen on darker and lighter parts of the shot and it’ll manually balance the exposure.
TIP: The absolute best way to get a killer Instagram photo is to shoot in natural light! If you’re able to use natural sunlight or actually be outside, do it. You’ll notice your photos will look so much more professional than shooting inside or with flash.
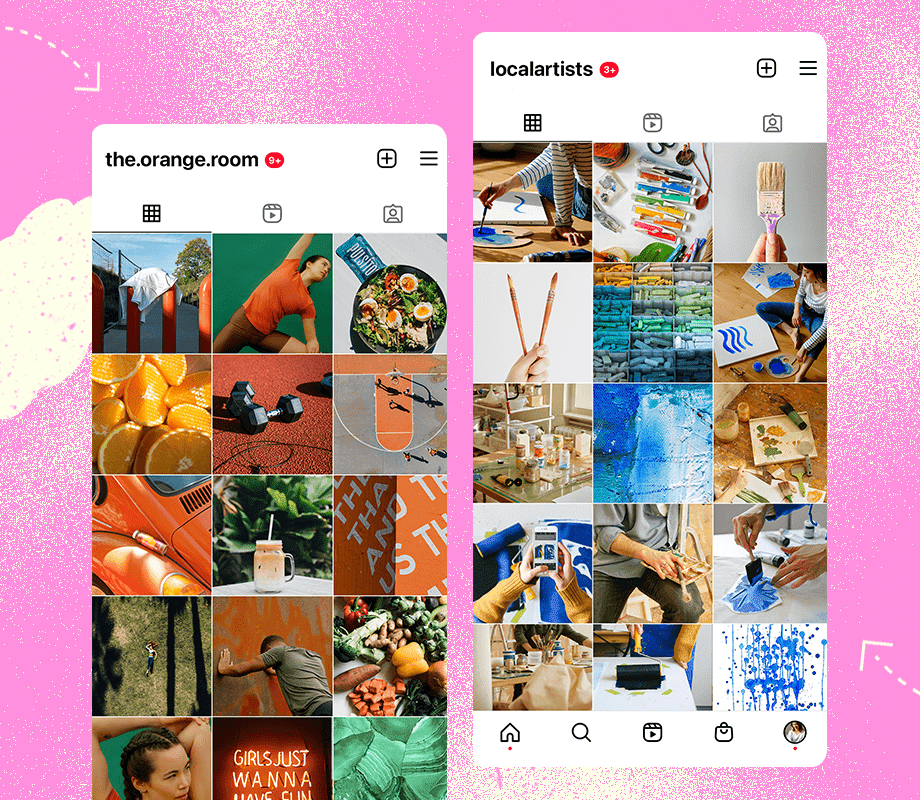
Once you’re ready to post the photos, you want them to stand out on your feed, right? Plan and re-arrange your feed posts with Later’s Instagram Visual Planner.
Later’s Visual Instagram Planner is the best way to plan your Instagram feed and make sure all of your photos are flowing together — it’s an aesthetic game-changer!
Use Later’s Visual Instagram Planner to see where your new photos will sit in your Instagram Feed.
Plus, you can do it right on mobile (iOS and Android).
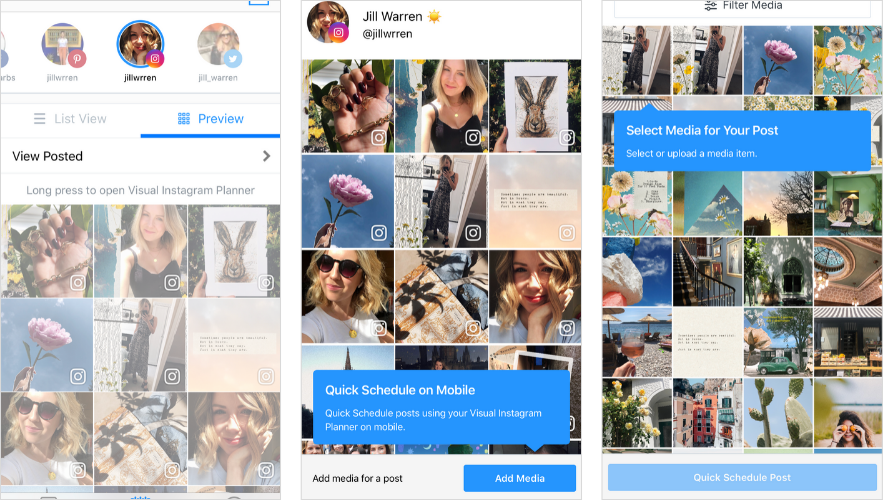
With Later’s Visual Instagram Planner, you can Quick Schedule new posts, see what your scheduled posts will look like on the feed, and drag and drop scheduled posts to rearrange them.
Ready to nail down your Instagram aesthetic? Design, curate, and plan your feed with Later!
Step #3: Learn How to Set Up the Shot
You’ve got your camera settings down and now it’s actually time to take the photo.
Whether you’re taking a selfie, a flat lay, a picture of your lunch or a picture of a blogger in front of a mural wall, it’s important to consider the art direction of your shot!
On Android, you can set up and capture your shot with voice control. Take a photo by saying “smile”, “cheese”, “capture”, or “shoot”.
The voice control feature can be helpful for selfies and those moments when you have the perfect shot but don’t want to push the button and ruin the moment.
Mastering The Flay Lay:
Flat lays have always been super-popular on Instagram, but nothing looks better than food in a dreamy flat lay set up!
When you’re taking pictures of food, there are a few things you have to remember. Food looks best from above and with natural light.
Think of using textured backgrounds when you’re planning your shot. Whites, light concrete, marble, wooden tables, and pastels are great options.
Jenna Rae Cakes, the cute aesthetically pleasing Canadian bakery, does a great job of photographing their baked goods.
Of course, it’s not just food that works in flay lay setups — product shots, and the fun “deskie” always works well in your grid!
You don’t need to have a professional photo studio or photoshoot to take killer content for your brand or business. With a minimal budget, you can set up your own at-home photography studio.
Ready to take beautiful product shots at home? Check out all of our tips and tricks here.
Finding the Perfect Backdrop:
If you’re looking to capture scroll-stopping Instagram photos, you’ve got to find the best photo spots. But, remember, you can make any spot Instagrammable using your creative eye.
Whether it’s the city you live in or are traveling, you can browse locations and hashtags on Instagram for inspo!
Studio DIY Wall Crawl is a great place to start to find those awesome backdrop walls for your next shot!
Tip: Posing in front of the camera is hard, instead, ask your photographer friend to take bursts of you and just keep moving in front of the camera — some of the best shots are taken while in motion.
Think About Props
Whether you’re going to be the subject of your photos, or you’re capturing some product shots, a prop or two can go along way in building a better photo.
From holding a cute coffee cup, to green foliage and plantlife, having something “extra” to your frame can bring it to life.
Step #4: Editing and Post Production
You’ve captured the photo and you know it’s the one, but now it’s time you bring it to the next level.
#1: Edit using Lightroom Presets
Using Lightroom to edit your photos is one of the best ways to get your photos looking beautiful for Instagram. And, on top of achieving super trendy beautiful photos, Lightroom presets make the editing process super easy and fast.
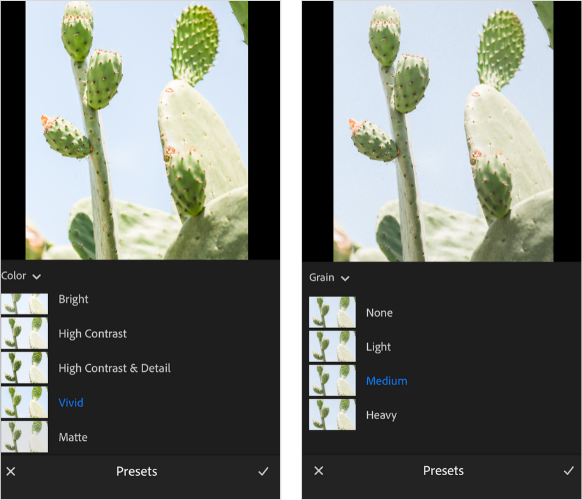
Plus, you can edit with Lightroom CC on your phone for free!
Once you start editing with Lightroom, even just by using the in-built Lightroom presets (which are like “filters”), you’ll start to see your image quality drastically improve, and you’ll start to develop a style that is unique to you and your Instagram feed!
When you’re happy with your content and feel ready to post, save time by scheduling, and auto-publishing your content with Later.
Taking the time to schedule a few days’ posts all at once is a great way to batch posts at the beginning of each week so you can spend more time shooting and planing your content without having to spend so much time on your social channels each day!
On mobile, view your scheduled Instagram posts in a list, preview, or on a calendar (iOS only).
With Later’s Visual Instagram Planner, you can Quick Schedule new posts, see what your scheduled posts will look like on the feed, and drag and drop scheduled posts to rearrange them.
Ready to nail down your Instagram aesthetic? Design, curate, and plan your feed with Later!
#2: Edit Using Editing Apps
Looking for quick-as-a-flash edits to help you level up your photos? There are tons of apps that can help you do that — with on-trend filters, clever editing, and perfect color correction tools.
These are some of our favorite photo editing apps to try.
But the editing fun doesn’t stop there, check out our 12 Best Photo Editing Apps for Instagram blog post for more great photo editing tips and tools!
#3: Stand out from the Rest with Collages and Stickers
Instagram overlay stickers and collages are the new creative trend on Instagram.
Many users are hopping on the trend and it’s working! If it’s in line with your brand, consider adding overlay stickers to your photos for a little fun touch.
In fact, we love the Instagram overlay sticker trend that much, that we created our very own stickers for you to use on your posts!
Instagram photography shouldn’t feel overwhelming, or out of your reach — with just a phone you have all the tools you need to create standout images and posts for your profile.
But the first step to getting that gorgeous grid is to getting out and snapping your content!
To spend more time shooting and planning your photos, Auto Publish your content with Later!
Plus — if you have an Instagram business profile — you can enable Auto Publish right on your mobile (for both iOS and Android).
If you’re a beginner, stick to these tips and you’ll soon be feeling confident in your photography skills.
Ready to start posting your gorgeous Instagram photos to your grid?
Don’t forget you can plan, schedule, and automatically post to your Instagram account with Later for FREE. Sign up today!
Like This Post? Pin It! ????
