Facebook Ads Manager can help you to find and connect with your ideal customers, increase brand awareness, and most importantly drive sales for your business.
And while getting to grips with all Facebook Ads Manager’s settings and features can feel overwhelming, learning how to correctly set up your ads really pays off for both your Facebook and Instagram strategy.
Here’s our quick guide to Facebook Ads Manager, so you can get started and set up your very first ad:
What is Facebook Ads Manager?
In a nutshell, Facebook’s Ads Manager platform is a one-stop-shop for running ads across Facebook, Instagram or Messenger.
The all-in-one tool allows you to create ads, manage where and when they will run on your social platforms, and track how well your ad campaigns are performing.
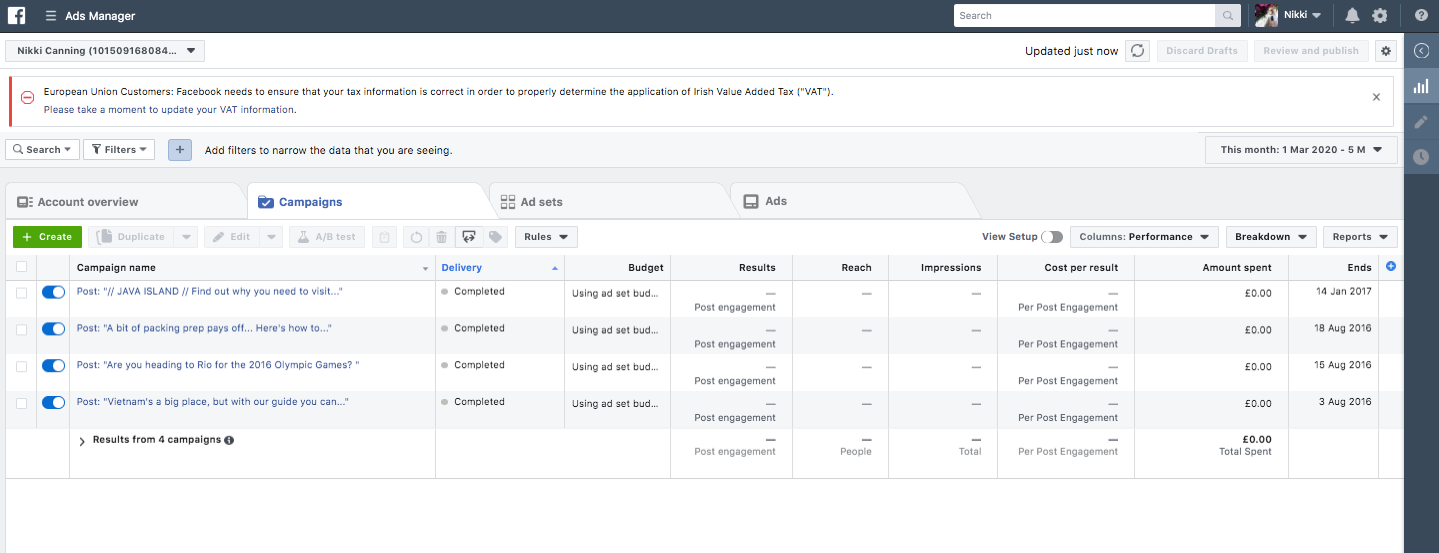
Ads Manager is packed full of cool tools and features to get your ads up and running, so it may feel a little overwhelming when you first get set up.
But don’t worry, it’s designed for brands of every size and following, and you don’t need to have previous ad experience to set up a killer campaign for your business.
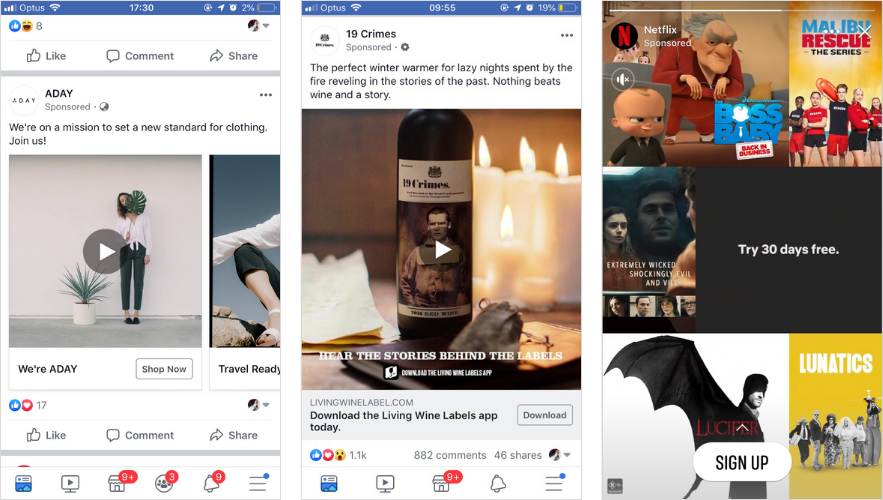
Here’s a quick snapshot of what you can do with Facebook Ads Manager:
Create new ad campaigns across Facebook and Instagram
Review and adjust your campaigns
Set specific target audiences for your campaigns
Learn from real-time ad reporting
Plus! A lot of the settings, tools, and strategies for running ads on Facebook can be set up and implemented on Instagram too — saving you time and effort!
Ready to get started? Here are 9 quick steps to run your first ad campaign!
Step #1: Create a Business Page to Access Your Facebook Ads Manager Account
Before you can get started in Ads Manager, you’ll first need a Facebook Page for business.
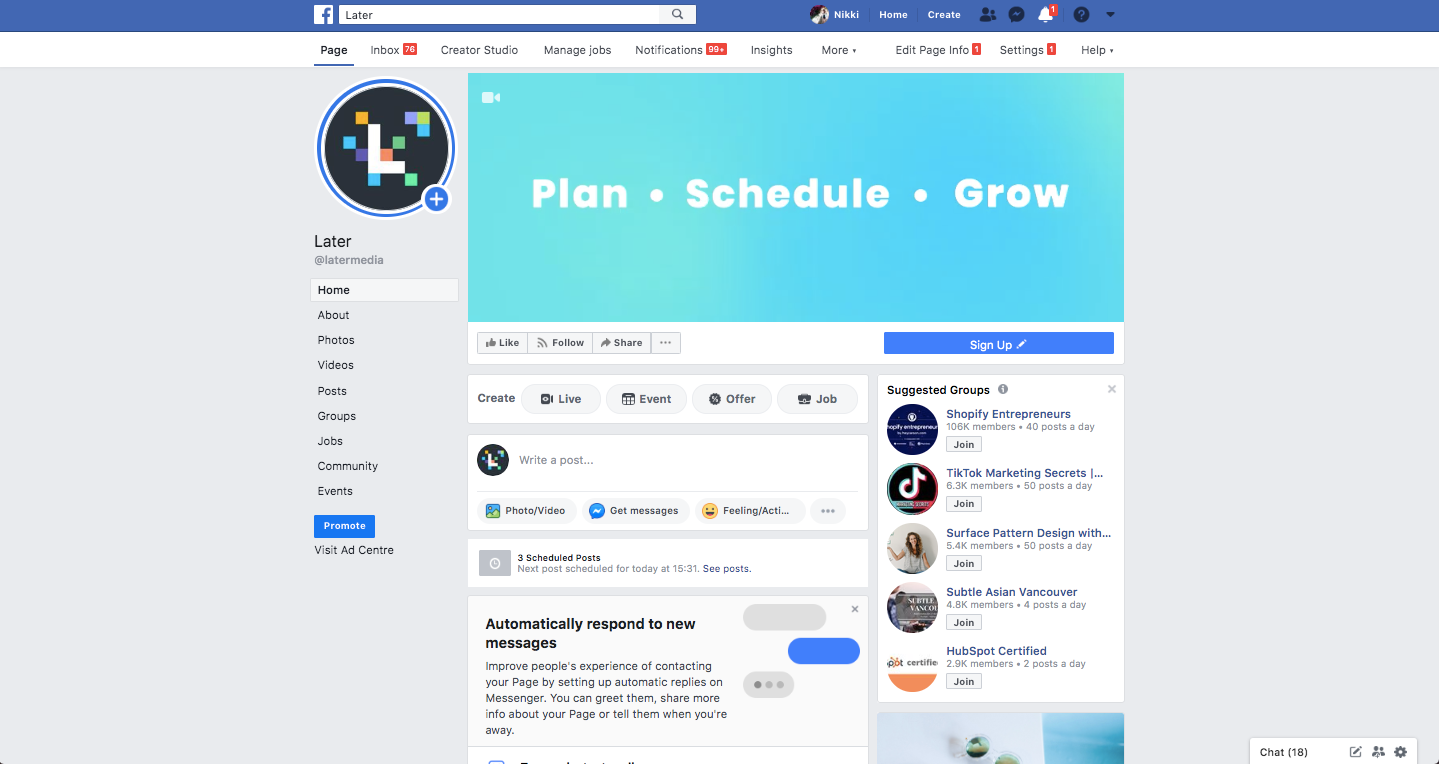
Having a Facebook Page is one of the best steps you can take to elevate your social strategy for your brand. Aside from getting access to business perks and tools like Facebook Analytics and ads, you’ll also be able to schedule your Facebook posts for your profile!
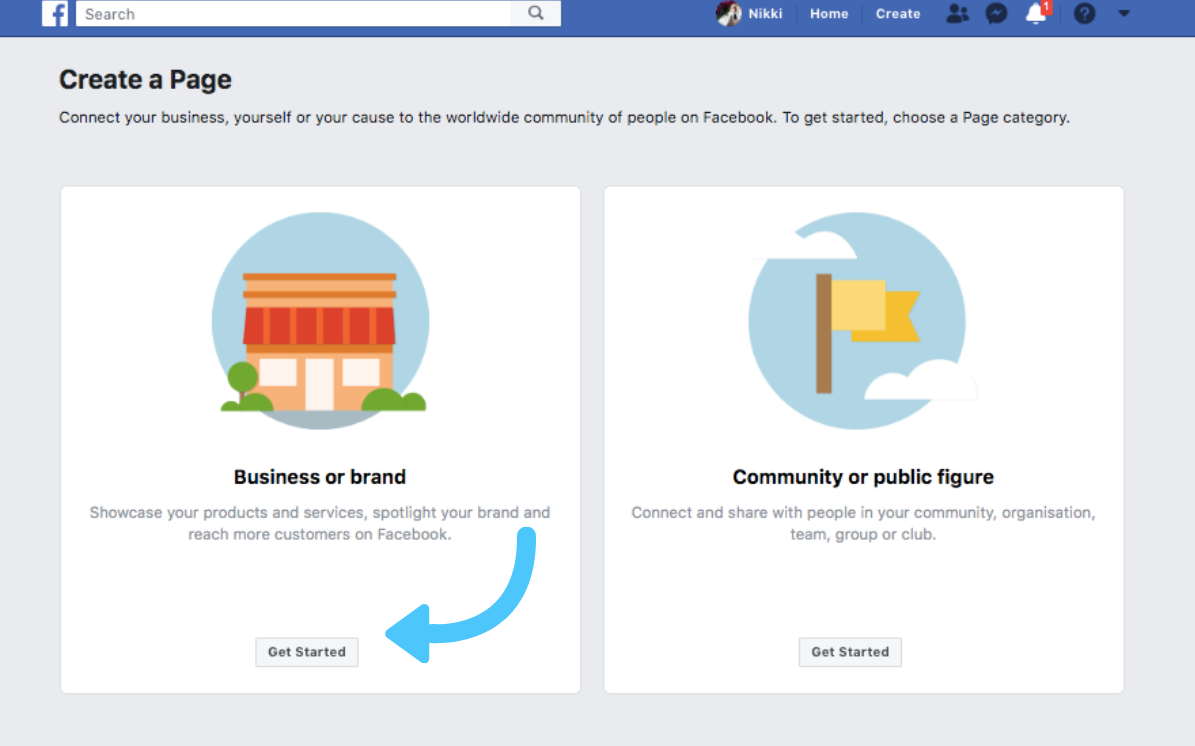
If you don’t already have a business Page, you can create one here!
Once you’re set up with a business profile, or if you already have one, Facebook makes it easy to create your first ad.
There’s no need to create an Ads Manager account because it’s created automatically when you set up your Page!
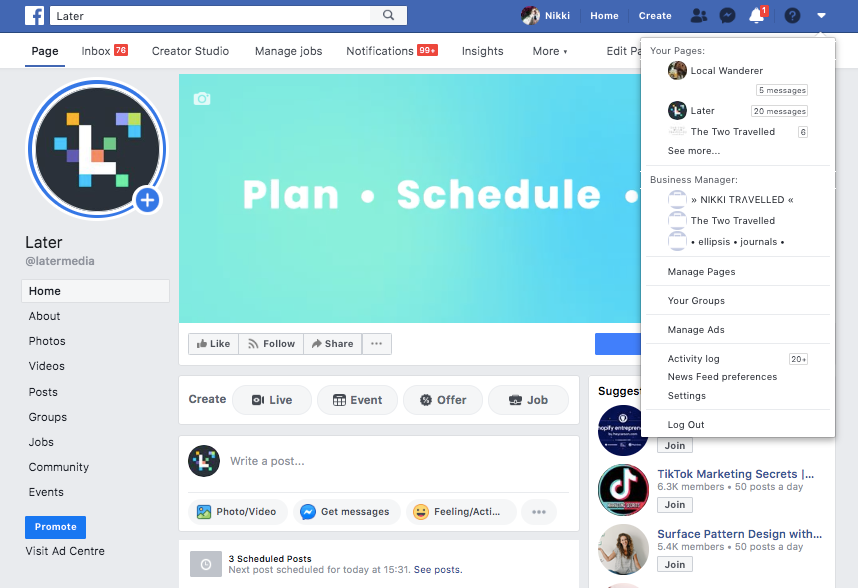
To access it, tap the Settings button in the top-right corner of your Facebook Page.
Did you know that you can schedule and automatically publish posts to Facebook with Later? Sign up now (it’s free!) to schedule your first post!
Step #2: Confirm Your Facebook Ad Manager Account Details
Next up, you’ll have to confirm a few details before you run your first ad.
When you first navigate to your Ads Manager settings, you’ll be presented with the ad account setup — this is where you’ll need to confirm some of your account preferences.
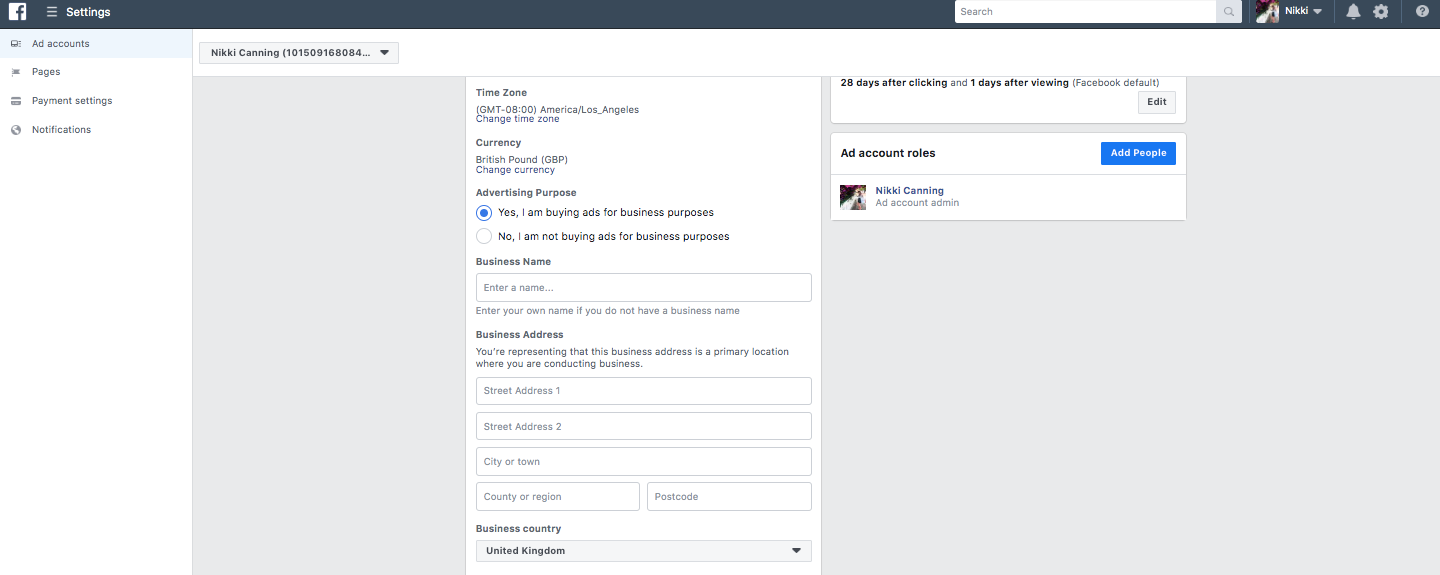
Facebook will automatically assign a random account ID number for your Facebook Page and set your currency and time zone based on where you’re located.
While the account ID is fixed, you can change your currency and time zone settings. For example, if you’re relocating your businesses, or setting up a specific Page for a store location, you may want to charge your Ad Manager account to a different currency.
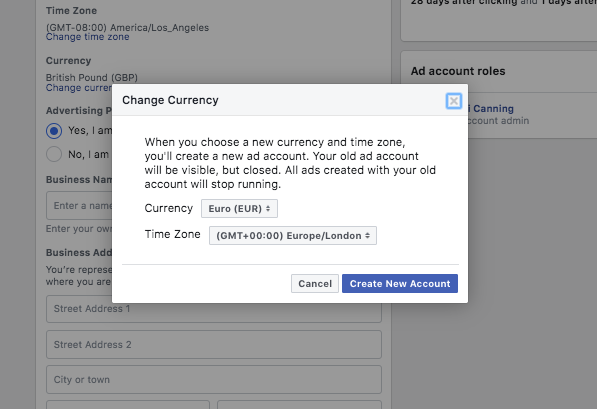
Keep in mind though that when you change your currency or time zone, you will automatically switch to a new ad account. Your old ad account will be closed, but it will still be visible but all of the ads created in that account will stop running.
But, if your default currency and time zone settings are correct, then you don’t need to create a new account or change any details.
Finally, you’ll need to confirm your business information and advertising purpose — Facebook asks these questions for legal reasons as there may be restrictions on certain types of advertising in your region.
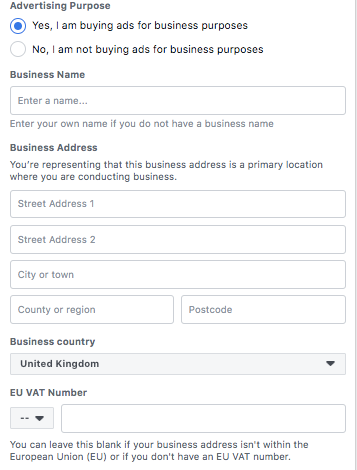
Once you’ve finished entering your business information, select “Save Changes” to confirm.
Step #3: Create Your First Ad With Facebook Ads Manager
You should now be able to access your Facebook Ads Manager and have your account settings set up to suit your business.
Once your Facebook Ads Manager dashboard opens, click the three bars in the top left-hand corner and select “Ads Manager” from the “Advertise” column:

Click the green “+Create” button on the home screen to begin the new campaign process.
You will be prompted to follow the steps, such as targeting details, budget, and ad content to complete the process of building and launching your Facebook ad.

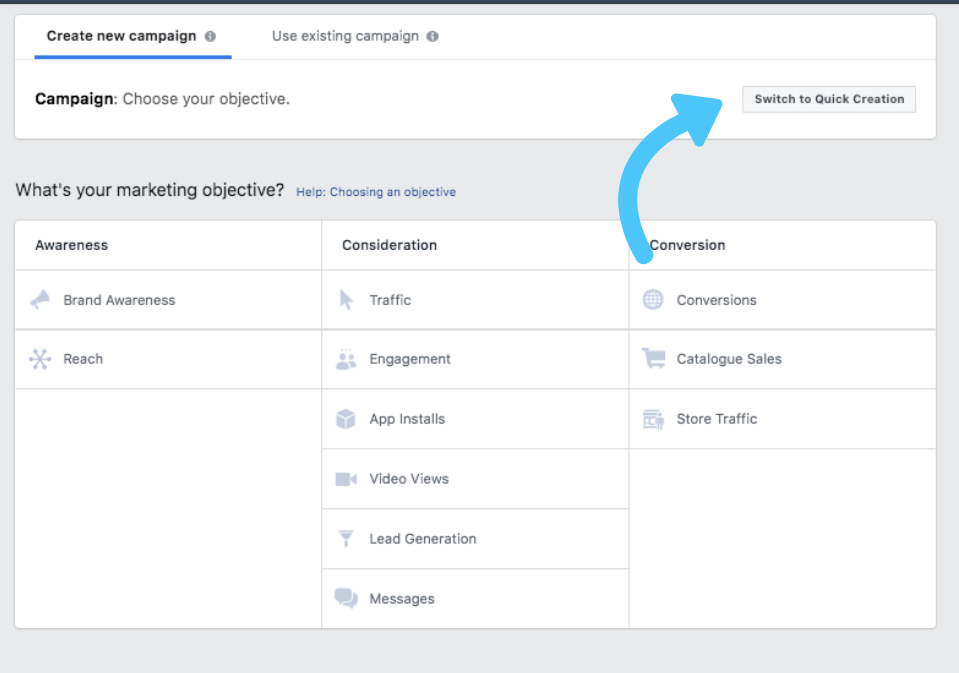
But if you want to make things even easier, click ‘Switch to Guided Creation’ in the top right-hand corner.
This will take you through a step-by-step guide to walk you through your first ad with ease!
Step #4: Choose Your Campaign Objective
Think of your Facebook campaign objective as your advertising goal — you want to have a clear objective in mind before your put budget behind your ad campaign.
There are 11 campaign objectives to choose from:
Brand awareness: reach people more likely to pay attention to your ads and increase awareness for your brand
Reach: show your ad to the maximum number of people
Traffic: for clicks to your website or to the app store for your app
Engagement: get more people to see and engage with your post or Page. Engagement can include comments, shares, likes, event responses and offer claims
App installs: send people to the store where they can download your business’ app
Video views: promote videos that show behind-the-scenes footage, product launches or customer stories to raise awareness about your brand
Lead generation: create ads that collect info from people interested in your product, such as sign-ups for newsletters
Messages: connect with people on Facebook, communicate with potential or existing customers to encourage interest in your business
Conversions: get people to take valuable actions on your website or app, such as adding payment info or making a purchase
Catalog sales: show products from your e-commerce store’s catalog to generate sales
Stores traffic: promote your brick-and-mortar business locations to people that are nearby
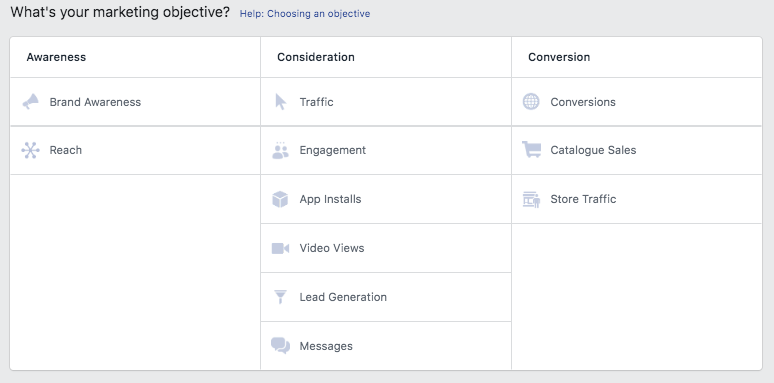
The most common ad objectives when you’re starting out with Facebook ads are Brand Awareness, Traffic, and Reach.
So for example, if you wanted to drive more people to your website, or a product page, you would choose Traffic as your objective.
Or if you wanted to showcase a new product or service to your wider audience, Brand Awareness would be a good objective to use.
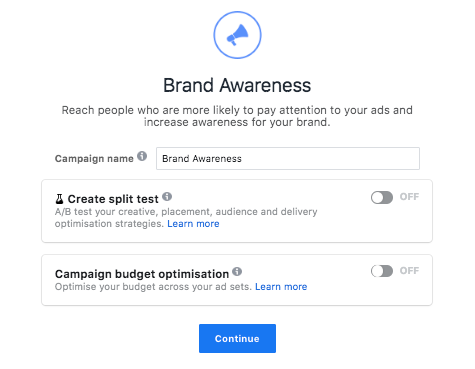
Once you’ve set your objectives, you’re ready to move onto the next stage!
Want to learn more about Facebook ad campaign objectives? We run through all your options and help you pick which objective is best for you in this blog post!
Step #5: Build Your Audience in Facebook Ads Manager
No two ads are the same and your target audience could also be very different from one campaign to the next, so it’s important to spend some time defining your audience.
First, select your audience locations from Facebook Ad Manager’s setup:
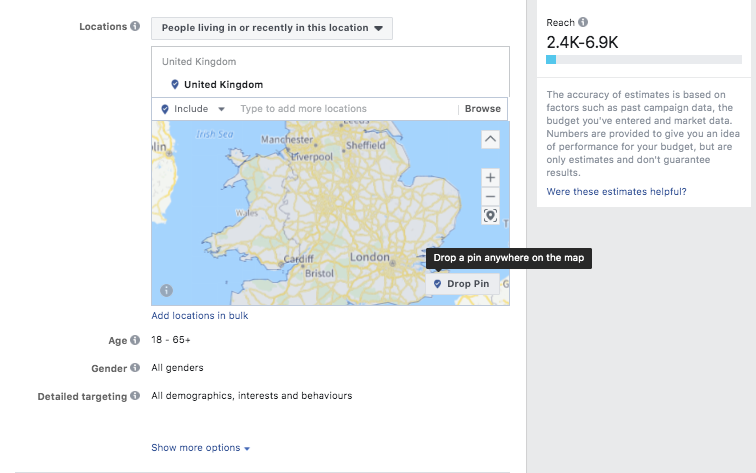
TIP: You can use the map to pin a location and edit the radius!
Once you’ve set your location, you can edit your age, gender and language fields to best suit who your customer typically is.
At the most basic level, your campaign needs to target a specific country, gender (if promoting a gender-specific offer) and age group. For example, your campaign could target women and men aged 18 to 40 who live in big fashion-forward cities.
But it’s better to get as narrow as possible with your target marketing! The more targeted your ads are to the right audience, the better chance they have of achieving your campaign objectives.
For example, you could target women, aged 24-35, living within a 10-mile radius of your physical store.
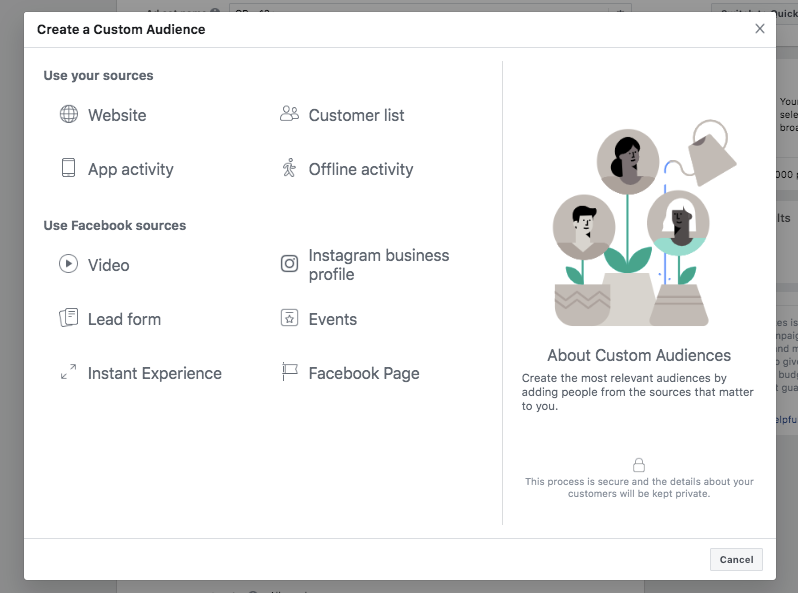
For more advanced ad settings, you also have the option to create a Custom Audience to reach people who have already interacted with your business, or a Lookalike Audience to reach new people on Facebook who are similar to your most valuable audiences.
Looking for info on setting up the best target audience for your campaign? We have you covered in this blog post!
Step #6: Add in Detailed Targeting Options with Facebook Ads Manager
Now it’s time fine-tune your ad targeting and really hone in on who will see your ads!
Facebook’s audience targeting capabilities are what really sets it apart from other advertising platforms — and so much of your ads’ success is weighted on your targeting.
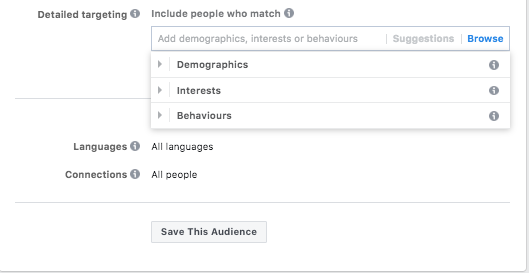
To help you maximize every ad, Facebook has created some hyper-specific and niche ways to find your audience. By defining a Facebook user’s behaviors, interests, life events, even their job title, you can narrow down the field on who sees your ad, making your audience much more likely to engage and react to your ads.
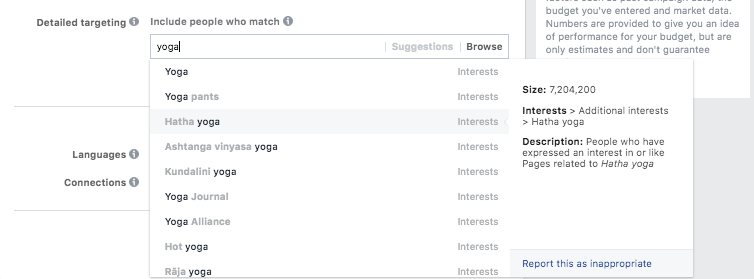
So it’s worth thinking about your customer persona and use keywords about their behaviors or lifestyle that would suit. For example, if you run a yoga studio, you might want to focus and target people who follow brands like Lululemon on Facebook, who follow yoga and fitness influencers, etc.
Plus, Facebook will also offer you suggestions, which can be really useful.
Step #7: Select Your Placements & Budget With Facebook Ads Manager
Now it’s time to select your placements and set an ad campaign budget.
An ad placement refers to where your advert will be seen across the platform. For example on the News Feed, on Facebook Messenger, or even on Instagram Stories.
If you’re setting up your ads for the first time, it’s best to select Automatic Placements in order to get as much value for your first time budget as possible.
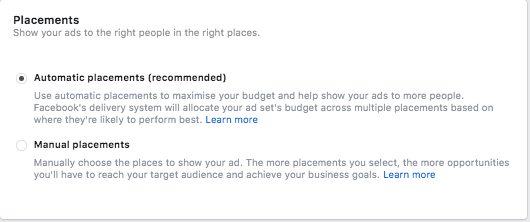
Without a benchmark from a previous campaign’s performance, having Automatic Placement is the easiest way to optimize where your ads will be shown without having to dig too deep into your analytics.
Now let’s talk budget — when it comes to your ad budget, you’ll need to tell Facebook how much you’re willing to spend overall.
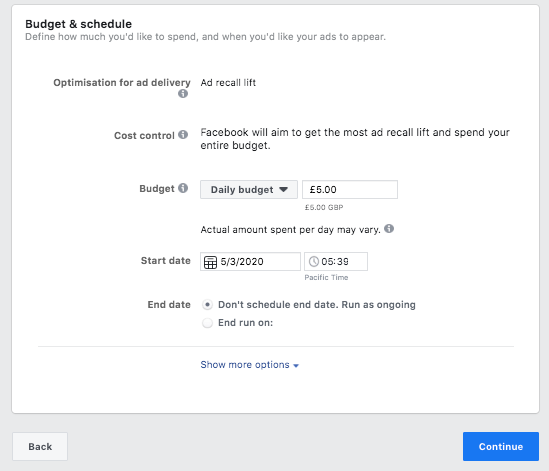
And before you put $$$ behind a campaign, it’s important to revisit your campaign objective. For example, if you’re optimizing your ads for a Traffic objective (ie. you want to drive more traffic to your website or Facebook Page) then you’re aiming for the lowest Cost Per Link Click.
However, if you’re optimizing for Engagement, you’re measuring Cost Per Engagement (Likes, Shares, Comments, etc).
As you make these adjustments to your ad you’ll see daily estimates for results pop up on your right-hand side — use this as a guide to set how much you want to spend. Facebook will also give you a warning message if it thinks your budget is higher than usual.
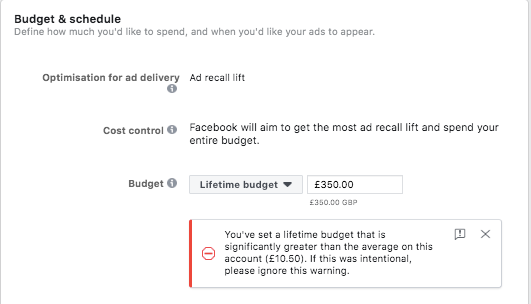
Finally, you’ll need to select either the “Daily budget” or “Lifetime budget”, and select a start and end date for your ad. Bear in mind your ads can be paused or stopped at any time!
Step #8: Designing Your Ad with Facebook Ads Manager
Finally, you can actually design your ad!
Facebook makes it super-simple to craft an ad that converts — just follow the prompts given by Facebook to choose your ad format, media, ad, and copy.
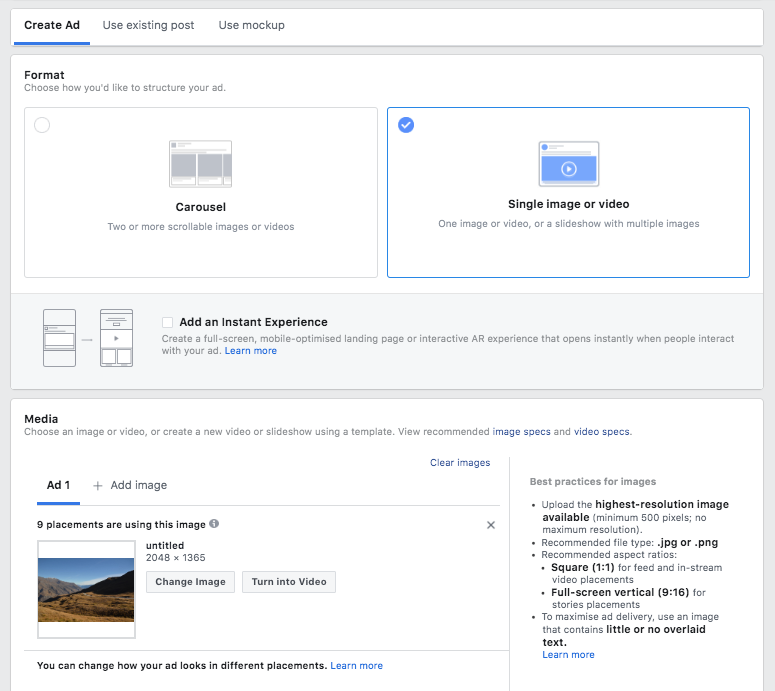
When it comes to your ad formats, you have a few options:
Single Image: a Facebook ad that uses one image
Single Video: a Facebook ad that uses one video
Slideshow: a Facebook ad that uses 2-10 images or videos
Carousel: a Facebook ad that uses up to 10 images or videos, but not both
Make sure your images fit Facebook Ad Specs to make sure your ads will run smoothly!
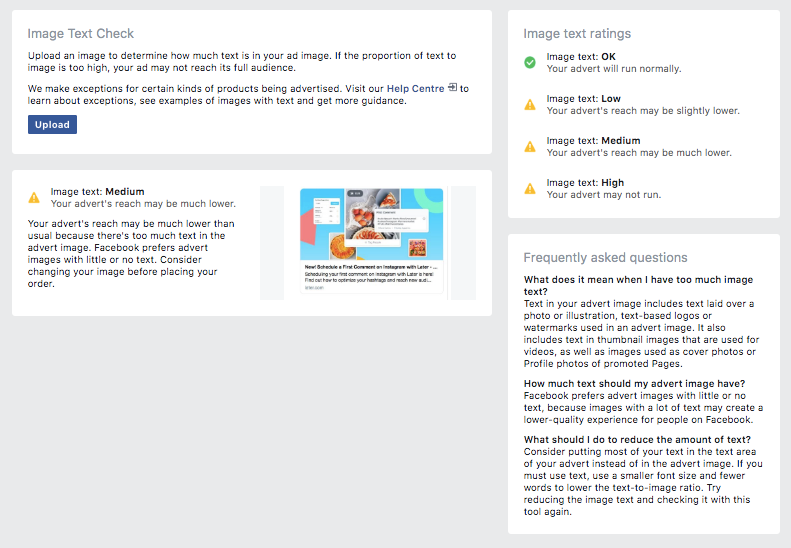
One design quirk that often catches brands out is that Facebook limits how much text you can have on an image to less than 20%. Anything more and your ad may be rejected. Check out Facebook’s 20% Text Checker
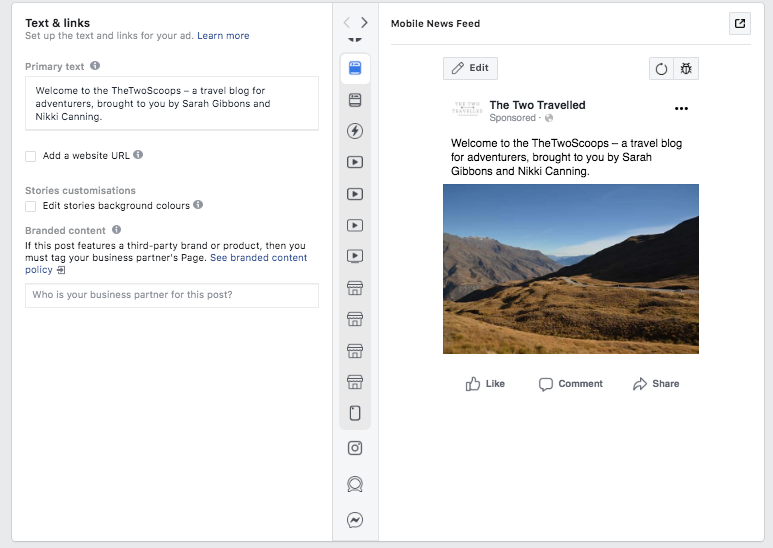
Next, input your ad copy, such as your headline, URL (remember you might want to add UTM tracking to this URL!), description, and call-to-action button.
As you complete the fields, you can see how your ad will look with your live ad preview, and how it will look against each placement.
To upload media to your Business Manager click “Add Media” followed by “+Upload”.
TIP: Facebook will store images here for your future ads, saving you time in the long run!
For more tips on how to create share-worthy content to increase your Facebook performance check out our blog post here.
Step #9: Publish Your First Ever Facebook Advert Using Facebook Ads Manager
And voilà! You’re ready to go with your first Facebook ad!
Once you’re happy with how your ad looks, click the green “Confirm” button in the lower right-hand corner of the screen to save your ad. Facebook will then review your ad, and it will go live once approved.
Sit back, relax and let your Facebook ads drive traffic and boost your business sales for you!
Facebook Ads Manager can be a powerful tool for your social marketing strategy. Once you’re set up with the basics, you can start to plan and execute killer Facebook ads that will deliver real results for your business.
Don’t forget! You can plan, schedule and automatically publish to Facebook with Later! Sign up now — it’s free!
Join over 1 million marketers to get social news, trends, and tips right to your inbox!
Email Address