Looking to get that coveted blue checkmark on Instagram?
While being verified gives your brand an extra dose of credibility, it can distinguish you from impersonators too.
So, how do you get verified on Instagram in 2024? We're breaking it all down below — including Instagram's new Meta Verified feature.
Join over 1 million marketers to get social news, trends, and tips right to your inbox!
Email AddressWhat Is an Instagram Verification Badge?
An Instagram verification badge is a little blue checkmark that indicates your account is the real deal.
It’s a form of authority that can be applied to brands, celebrities, or creators:
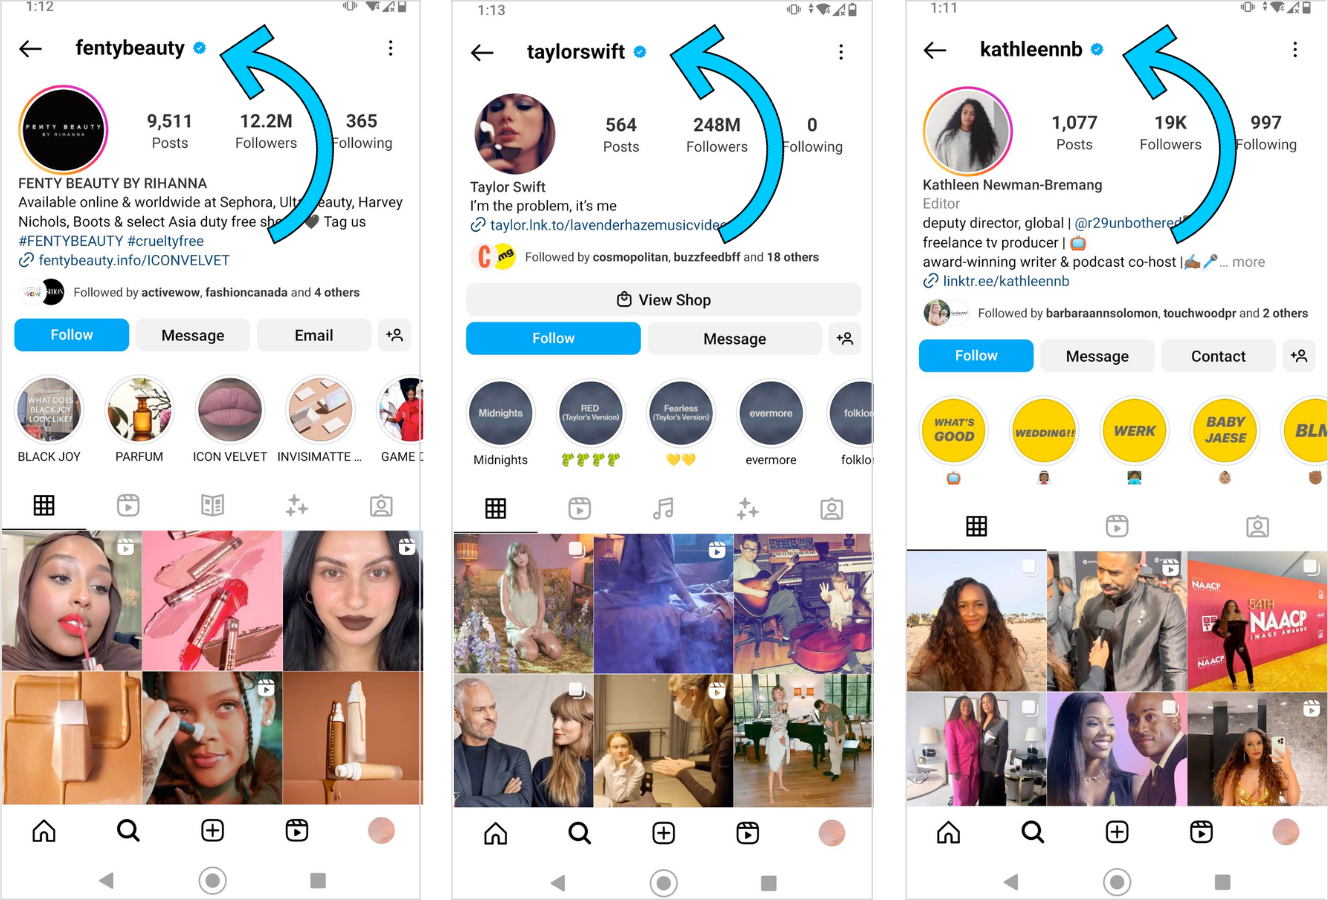
Verification badges are easy to spot in search results and on profiles, as they're designed to make an account stand out.
How Many Followers Do You Need To Get Verified on Instagram?
There is no required number of followers that you need to get verified on Instagram.
However, there are core requirements that you must meet — whether you subscribe to Meta Verified or apply for a badge (more on those requirements, below).
How Can You Get Verified on Instagram?
You can apply for verification in two ways:
Apply for an Instagram Verification Badge
Subscribe to Meta Verified
#1: Apply for an Instagram Verification Badge
One of the core requirements when applying for verification directly in the app is to have a notable account.
This means that your account must represent a well-known and highly searched-for person, brand, or business.
Here's how to request an Instagram verification badge in five steps:
Step #1: Log into the account you're requesting a badge for. Head to your Settings and tap "Settings and privacy".
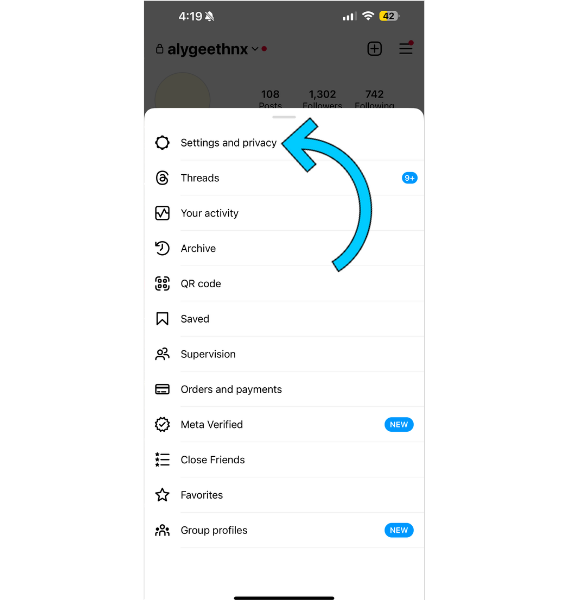
Step #2: From there, select "Account types and tools" and "Request Verification":

Step #3: Enter your username, full name, and attach a form of identification (it must be government-issued):

Step #4: Confirm your notability by category and country.
You can also add links to relevant articles or other social accounts that show public interest:

Step #5: Scroll down and tap "Submit":

You’ll receive a notification in up to 30 days after applying to let you know if your account’s been verified or not.
If your request is denied, you can re-apply after 30 days.
NOTE: Instagram can remove verified badges if you switch your account from public to private too many times, violate their Community Guidelines and Terms of Use, or if you advertise, transfer, or sell your verification.
#2: Subscribe to Meta Verified
First things first, Meta Verified is a new paid subscription service that includes the verification badge.
According to the platform, it will help creators "establish and grow [their] presence on Instagram and Facebook."
Meta Verified currently costs $11.99 (USD) a month on the web and $14.99 (USD) a month on iOS and Android systems.
In order to be eligible, you must be meet a list of criteria, such as:
Be at least 18 years old
Have a government-issued ID that matches your name and picture
Have two-factor authentication set up
And more
It is currently being tested in Australia, New Zealand, and the US, so if you don't have access yet, you can join Meta’s waitlist.
For more information about the Meta Verified subscription, read this: Everything You Need to Know About Meta Verified.
So there you have it — Instagram verification in two ways!
Beyond the status of a blue check, getting verified on Instagram is a great way to build trust and credibility for yourself or your brand.
Whether you apply for a badge or subscribe to Meta Verified, use these tips as your go-to guide.
And then you can get back to making quality content for your brand and engaging with your community.
Ready to level-up your Instagram strategy? Start scheduling your posts in advance with Later — it’ll take less than five minutes.
