Instagram Stories stickers aren’t just a fun way to add more personality to your stories — they’re also extremely useful for growing your businesses!
Whether you’re trying to grow your engagement, build more brand awareness, drive traffic to your website, or even make e-commerce sales, there’s definitely an Instagram Stories sticker that can help you along the way.
Ready to learn how?
We’re sharing 13 Instagram Stories stickers that are perfect for businesses and how some of Instagram’s best brands are using them:
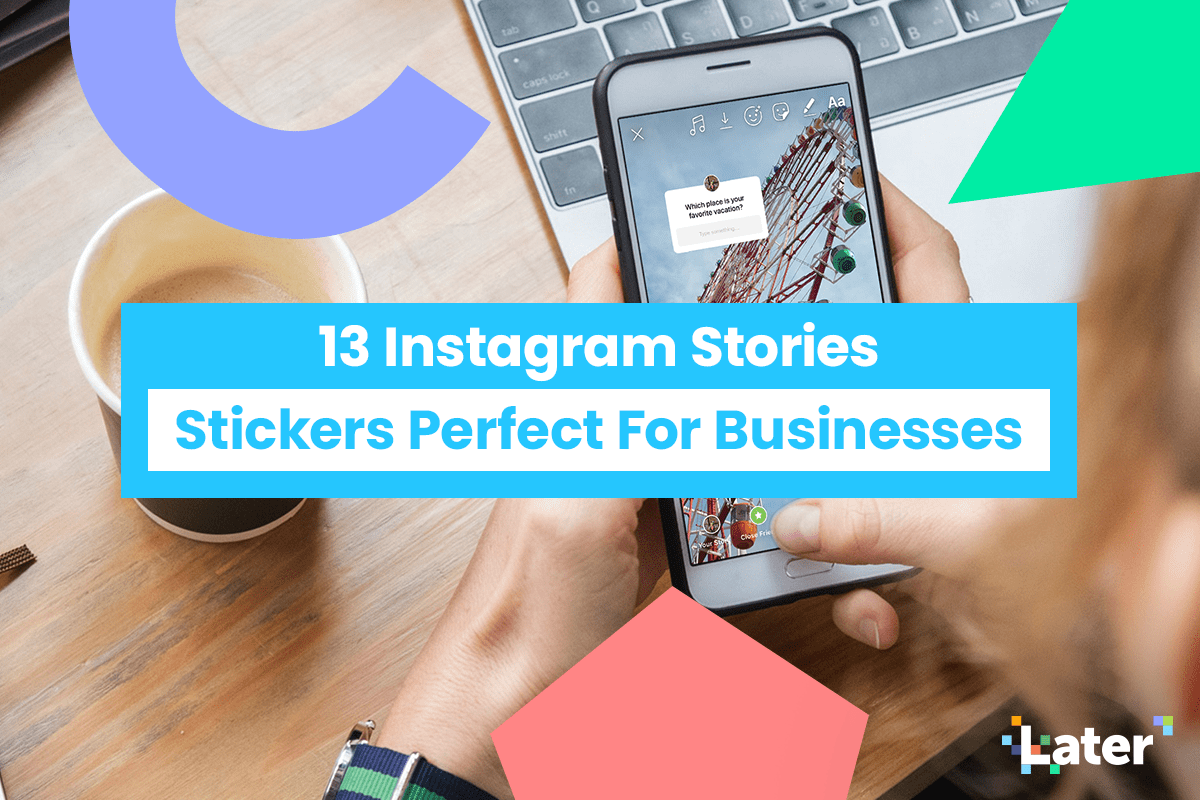
Instagram Stories Stickers #1: Quiz Sticker
The quiz sticker is an easy way to engage with your audience — and have some trivia-style fun!
It’s one of Instagram’s most interactive stickers, and as a business, you can use it in various ways like quizzing your audience, educating them about your products, or to dig deeper into their interests.
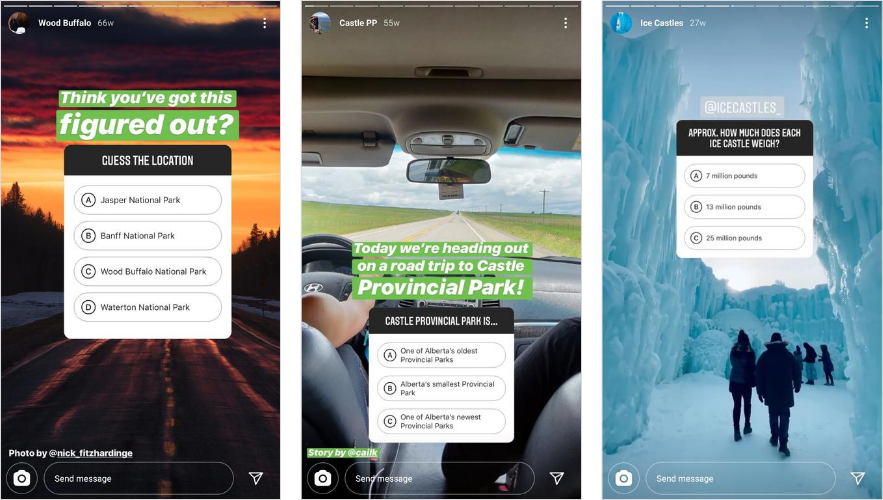
Travel Alberta frequently uses the quiz sticker to educate travelers about must-see locations in the province.
A beauty company could use the quiz sticker to discover their audience’s morning skincare routine.
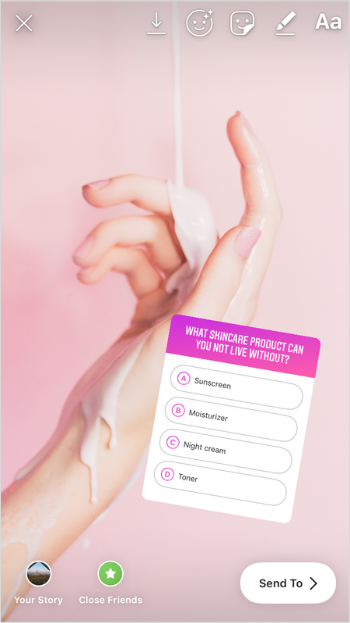
Based on the responses, they’ll be able to see what product their audience loves, and use the feedback when creating future products and launches.
Best for:
Quizzing and educating your audience
Collecting feedback
Increasing engagement
Want to save time and get more views on your Instagram stories? Plan, optimize, and schedule Instagram stories — available now on all paid plans!
Instagram Stories Stickers #2: Donation Sticker
Care about a social cause? Thanks to the donation sticker, it’s now easier than ever to support and raise funds for a nonprofit on Instagram.
And aligning your brand with a social cause has its benefits: studies say that 70% of millennials will spend more with brands who support causes.
Incorporating a CSR (corporate social responsibility) strategy into your brand’s vision and mission can increase loyalty and turn customers into advocates.
Influencers, celebrities and creators use the donation sticker to support and build awareness about causes they care about — making them more relatable to their audience.
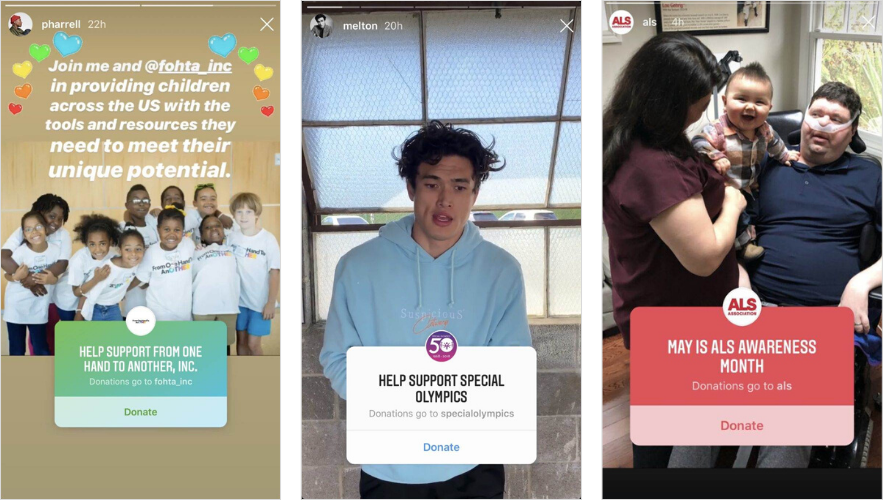
If you’re a nonprofit, the donation sticker is a great way to build awareness around your mission and cause.
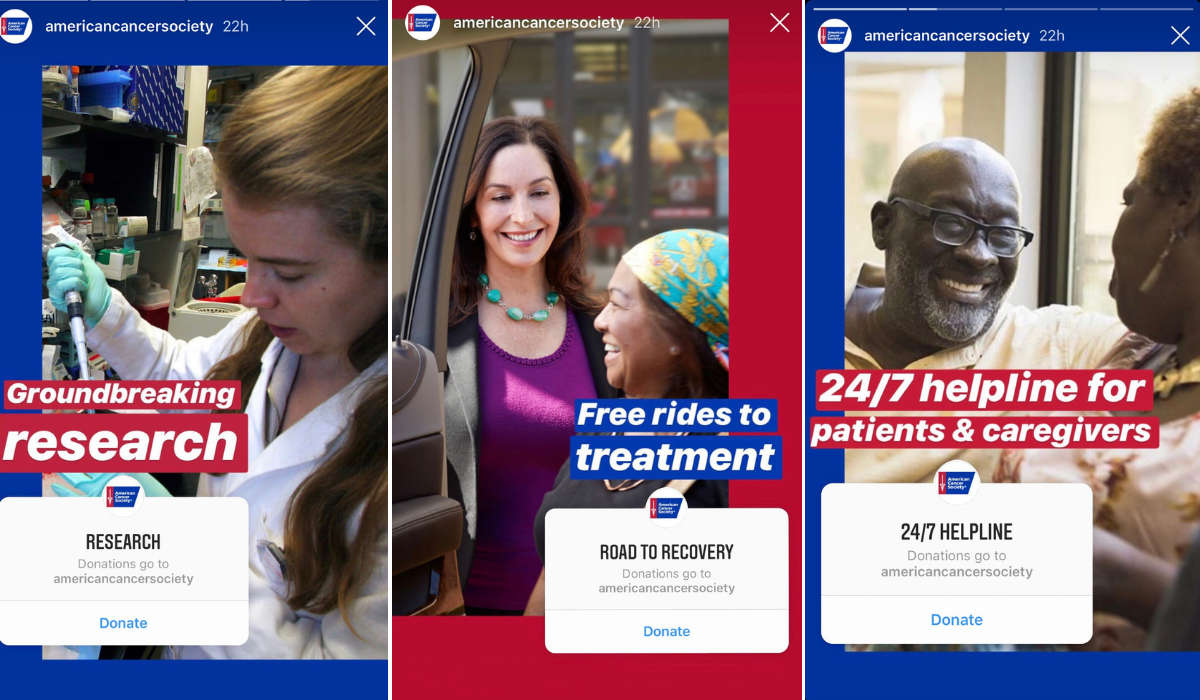
For example, the American Cancer Society frequently uses the donation sticker to draw attention to their organization and how donations help their community in various ways — from free rides to funding research.
Best for:
Building awareness and support of your mission
Increasing brand loyalty
Humanizing your brand
Instagram Stories Stickers #3: DM Me Sticker
The DM Me sticker is perfect for engaging with your community and encouraging meaningful conversations.
There are a number of ways you can use the DM Me sticker. For example, you could use it to promote an upcoming event or new product line.
By gaining a deeper understanding of what specific members of your audience want to know, you can share more relevant updates with your wider following.
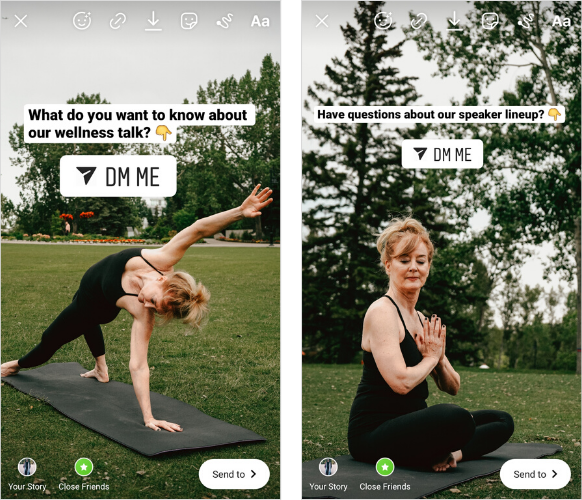
Armed with this valuable insight, you can incorporate the FAQs when creating future content — and generate more buzz about your event!
Another way to use the DM Me sticker for your business is to gather feedback.
Your audience is the perfect group to ask what they love about your brand, what products they’d love for you to create, or to get a pulse check on how they’re feeling.
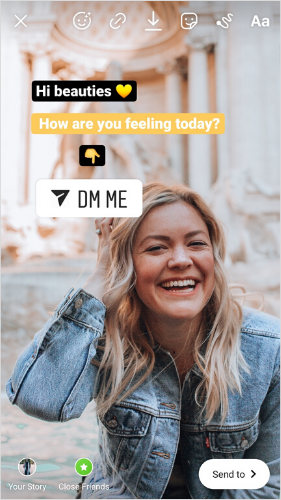
Creating the opportunity for one-on-one conversations can make your brand feel much more personable.
It’s easy for followers to forget that a real person exists behind the screen, so encouraging interactions in this way can be a great reminder.
Best for:
Having meaningful conversations in direct messages
Sharing important information
Gathering feedback
Instagram Stories Stickers #4: Food Delivery & Gift Card Stickers
Earlier this year, Instagram announced that businesses could share stickers specifically for food orders and gift cards in their stories.
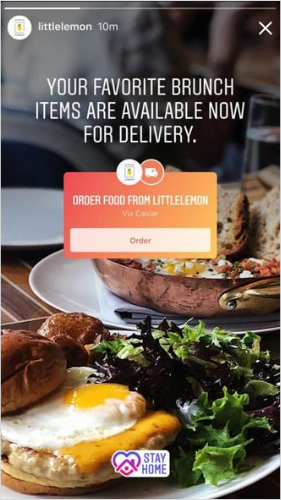
With the COVID-19 pandemic causing financial pressures for many small businesses, these stickers provide a new way for communities to support them.
Gift Cards are a new way for businesses to sell redeemable vouchers on their stories, while food deliveries provide a way for businesses to drive awareness of their food delivery services and encourage orders.
The new sticker can be used to place orders through Caviar, ChowNow, deliver.com, UberEats, GrubHub, Seamless, Postmates, Doordash, and more.
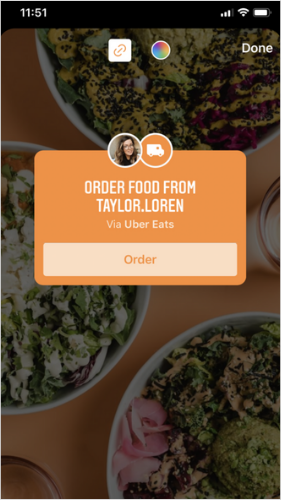
Brands can also encourage their audience to share the stickers in their stories and recommend a menu or services to their friends.
Best for:
Supporting small businesses
Amplifying your products or services
Increasing online orders
Instagram Stories Stickers #5: Location Stickers
If you’re looking to get more views and engagement on your Instagram Stories, you need to start tagging locations with Instagram’s location sticker.
Like location tags for regular Instagram posts, when you tag a location on Instagram Stories, such as a neighborhood or a restaurant, your story will appear in the public stories feed of that location. So anyone who searches for that location on Instagram will be able to see and engage with your story.
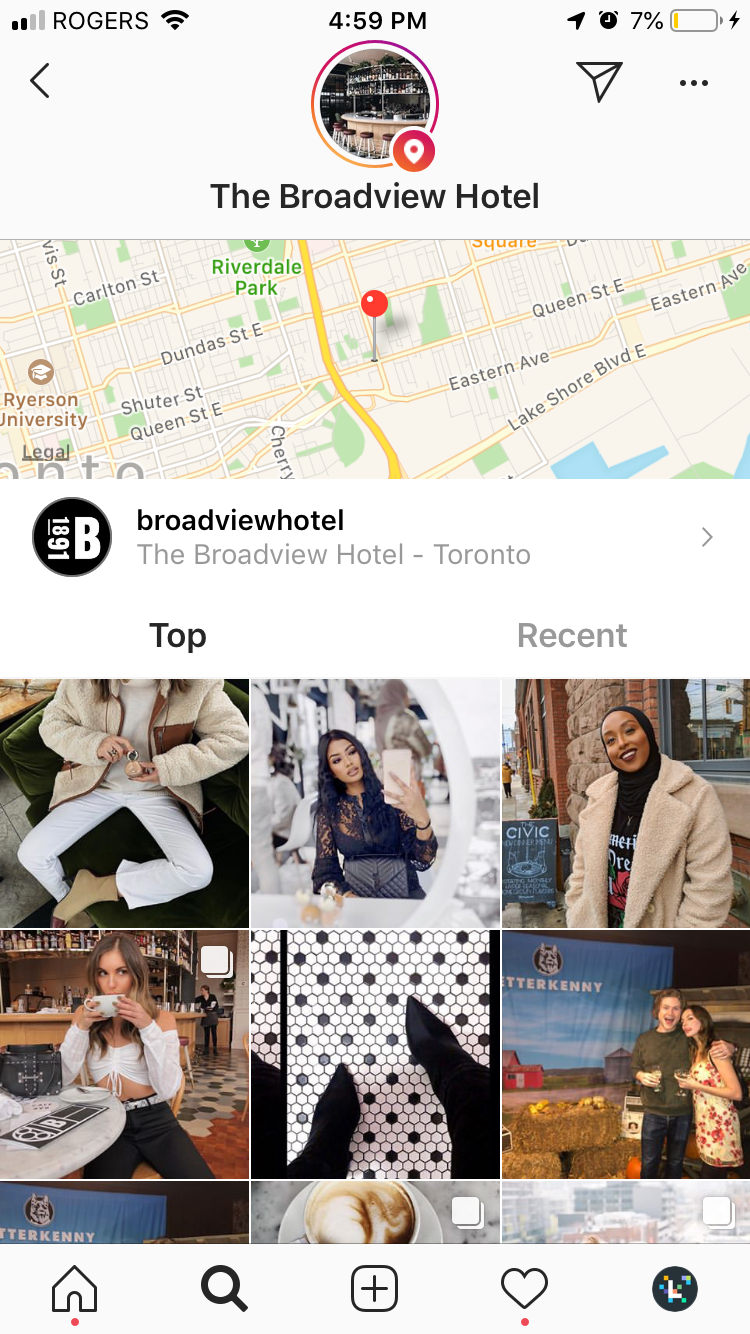
In other words, using Instagram’s location sticker can help boost the discoverability of your stories and get them seen by people who aren’t following you.
But it’s useful for other things, too.
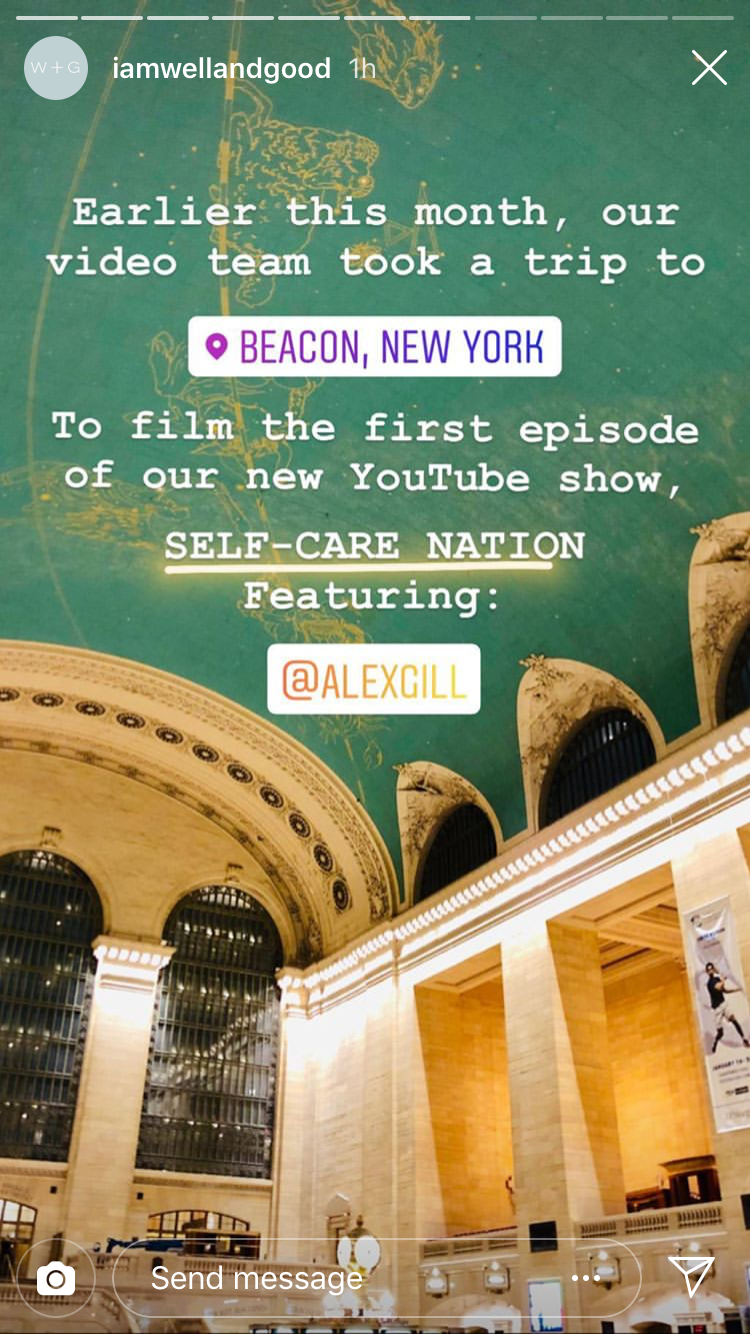
Take @iamwellandgood, for example. The health publisher often uses location stickers to highlight their location-based projects and campaigns:
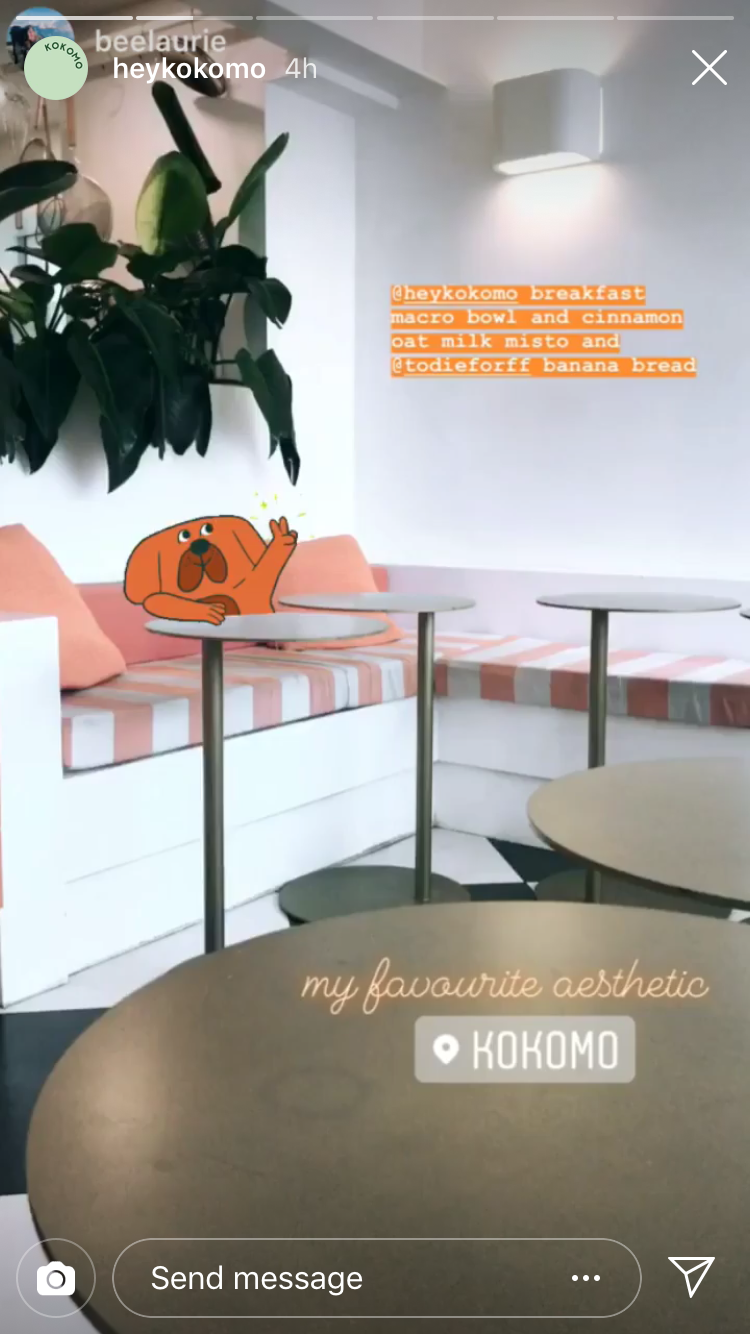
Plant-based cafe @keykokomo often tags their location in their Instagram Stories to help drive awareness and (hopefully) foot traffic to their cafe. This is a great strategy to follow if your business has a physical location:
Location stickers are also perfect if you’re running a location-based event, like a pop-up sale or a conference. You can preemptively share a story with the tagged location a few days ahead of the event so your followers know where to be on the day!
Just remember to keep your tagged locations relevant to the content you’re posting. Rather than tagging your stories with random, highly-searched for locations like New York City and Los Angeles (which might get you a few views but won’t make sense contextually), it’s important to be strategic and thoughtful about the locations you tag.
Best for:
Increasing your story’s discoverability
Getting more views and engagement on your stories
Drawing attention to your business’ physical location
Instagram Stories Stickers #6: Mention Stickers
When you’re working with other brands on Instagram or reposting user-generated content (UGC), it’s really important that you shout-out to their account with the mention sticker.
Not only will the account be notified that you mentioned them, but it goes a long way when it comes to building your community. That account may, in turn, repost your story and thank you for the mention or even share it with their followers.
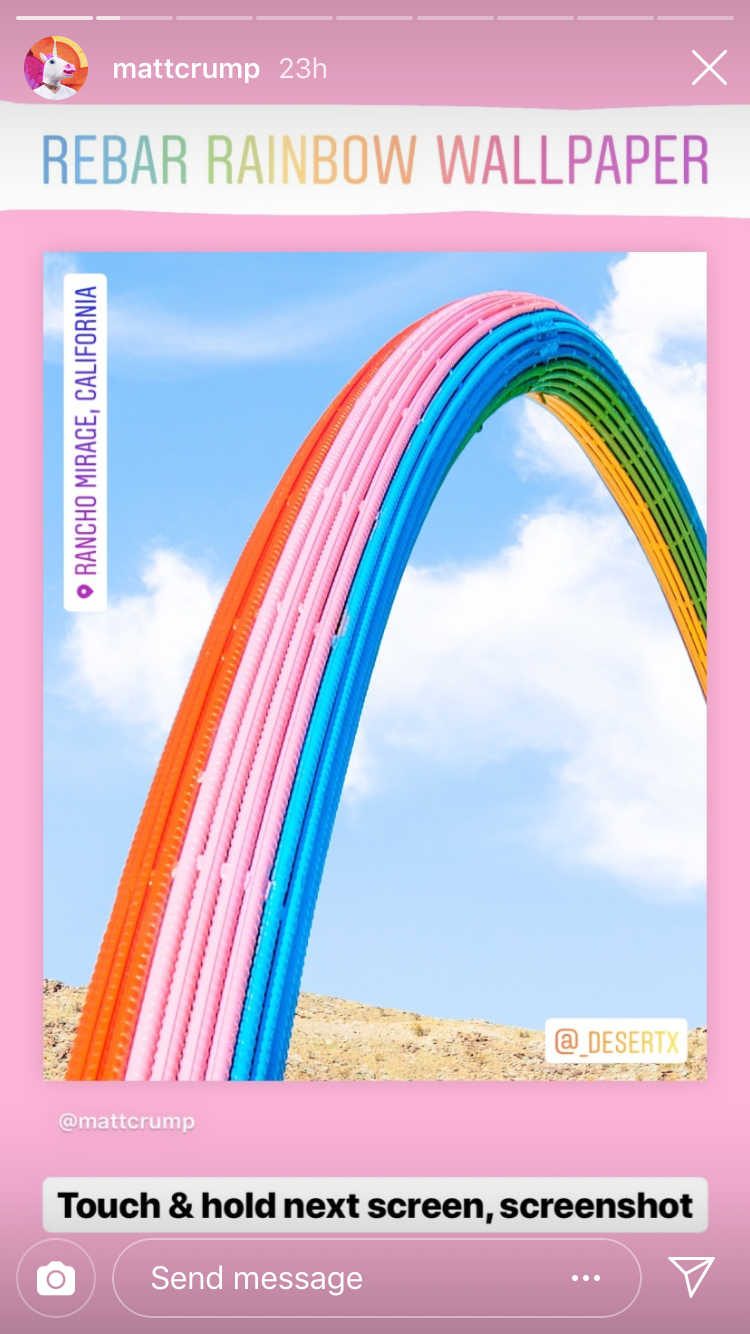
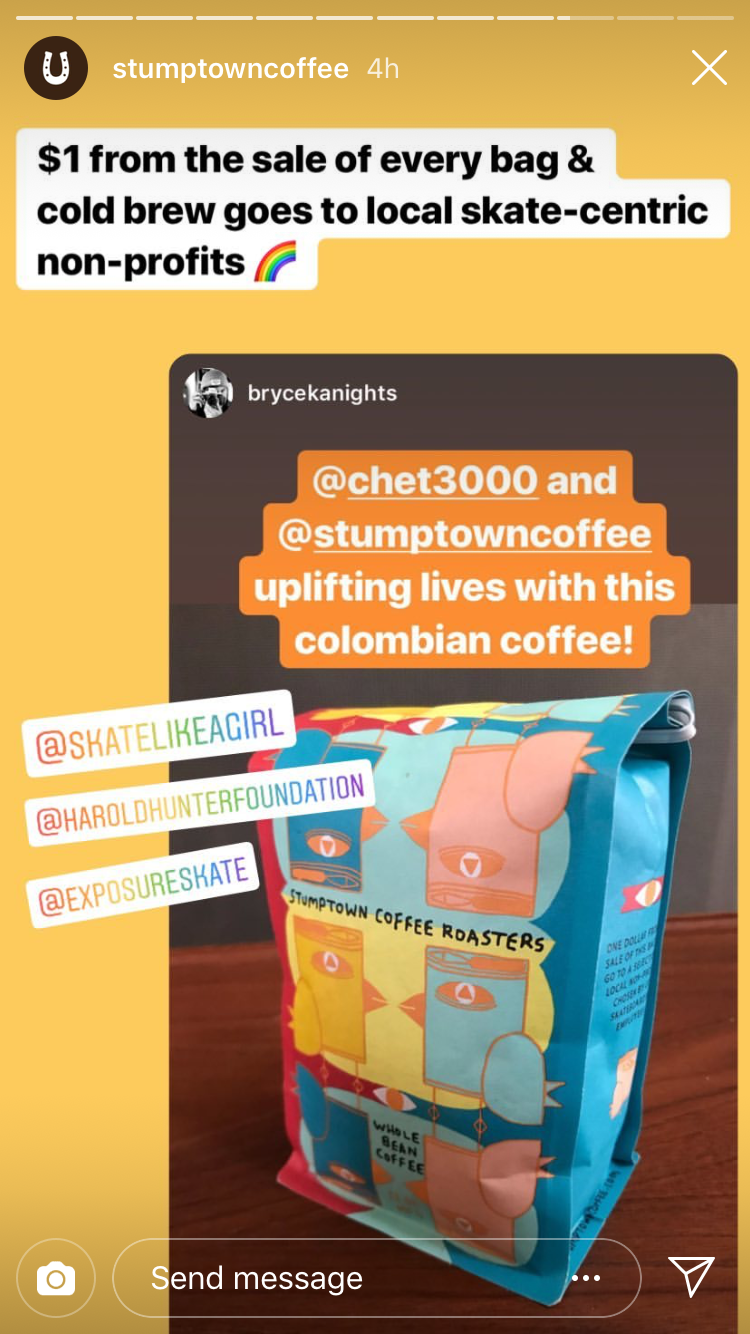
But there are really tons of use cases for Instagram’s mention sticker. For example, @stumptowncoffee often uses it to highlight their team members and collaborators @paddlers_coffee:
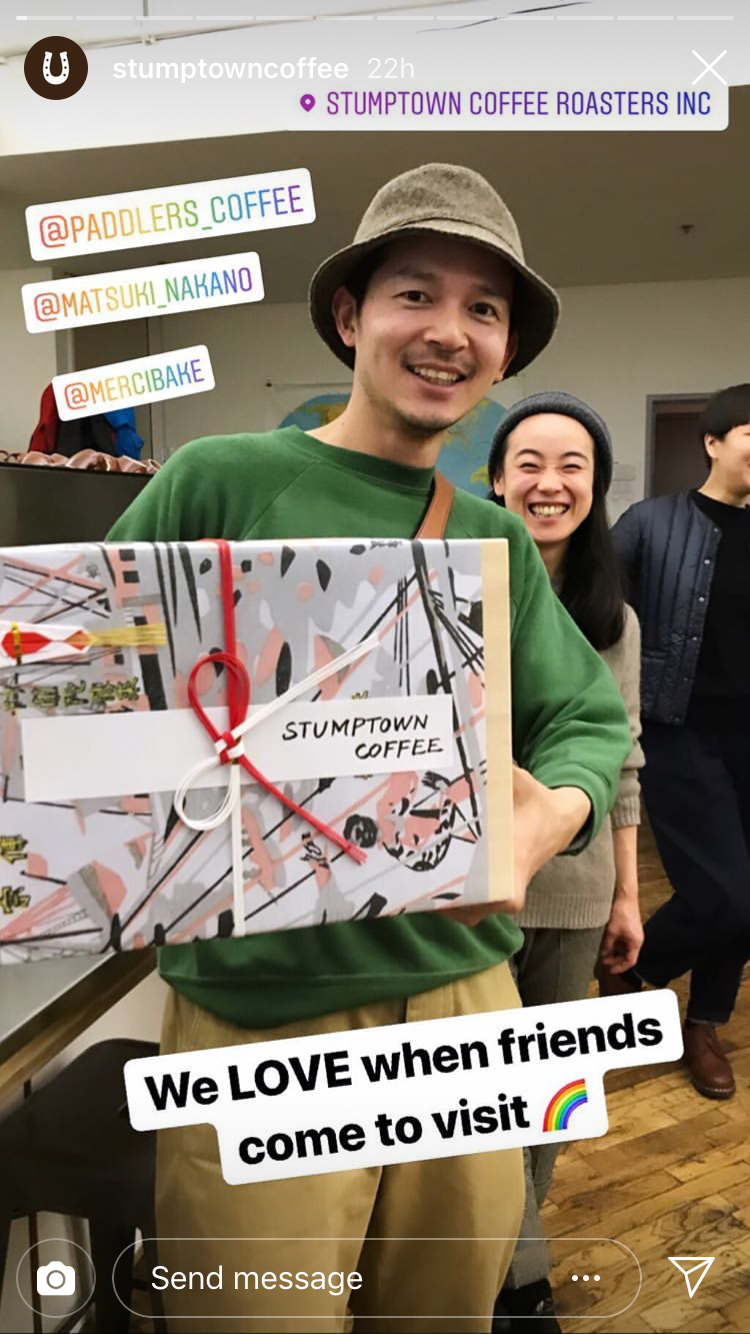
Not only does this humanize the brand by showing the people behind-the-scenes, but it also helps draw attention to their campaigns and initiatives:
Best for:
Highlighting other Instagram accounts
Highlighting partnerships and influencer campaigns
Instagram Stories Stickers #7: Hashtag Stickers
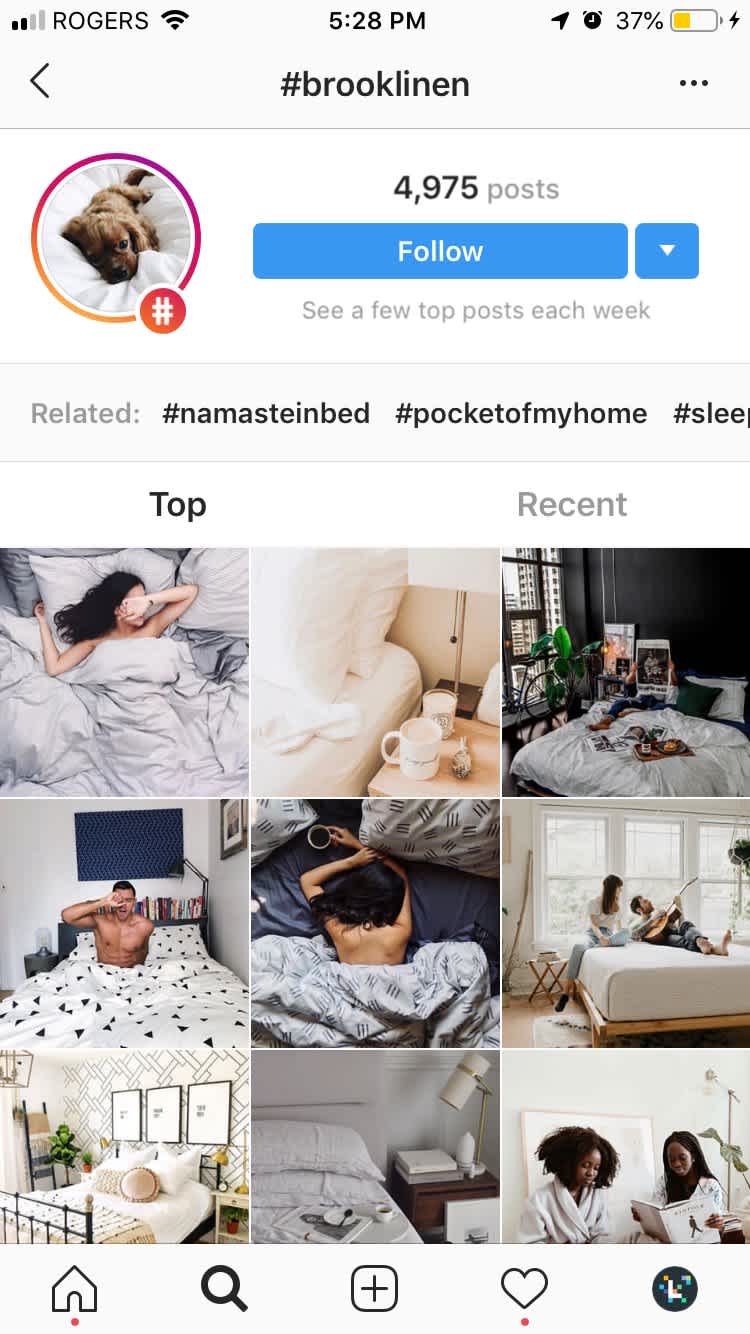
Much like location stickers, when you tag your story with a hashtag sticker, other users will be able to see and engage with your story on that hashtag’s page.
Or if your followers tap on the hashtag sticker on your story, they’ll be brought to the hashtag page and will be able to explore other media that’s been shared with the same hashtag.
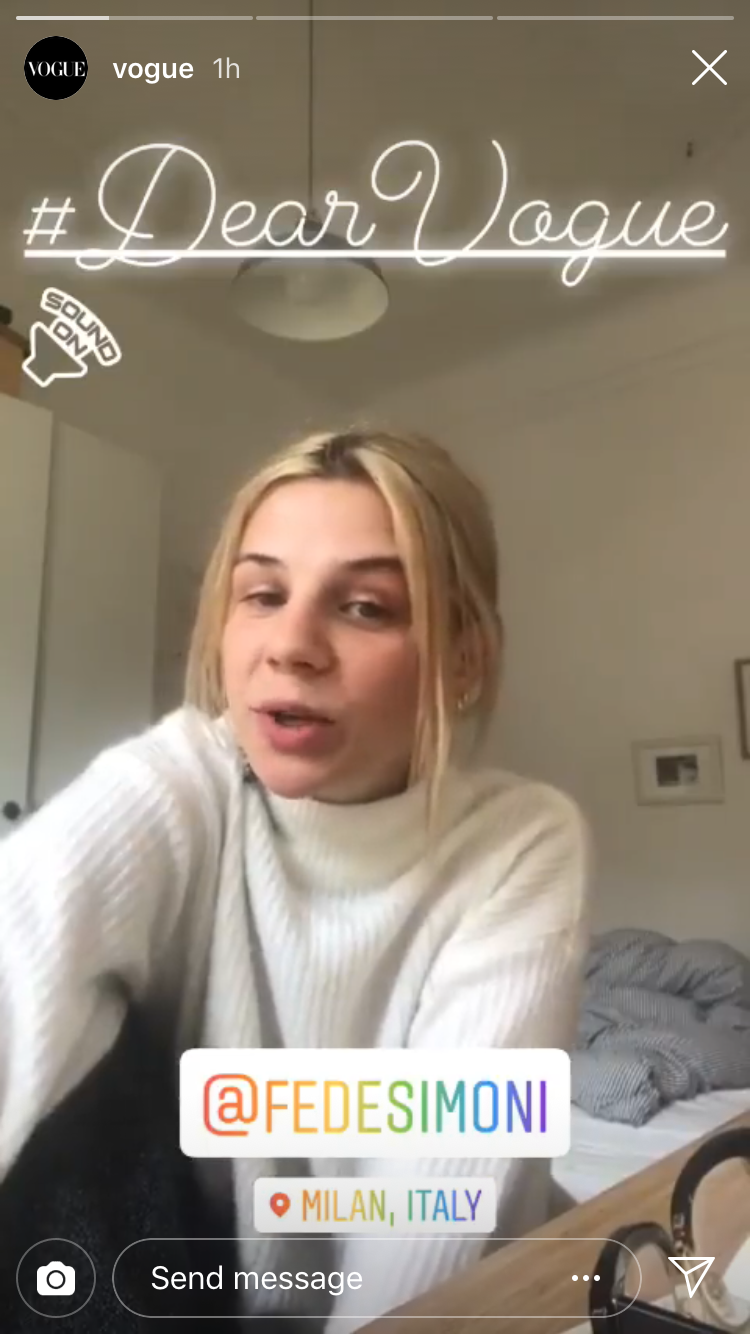
For businesses, the hashtag sticker is another great way to promote your branded hashtag on Instagram Stories. For example, @vogue often shares stories with their branded hashtags, like #dearvogue, which they use to share stories about women and empowerment.
When people view their stories, they can click on the branded hashtag to engage with the rest of Vogue’s branded content.
Another example comes from @justforall. The food-tech company often uses hashtag stickers to highlight their products — as they did here with their vegan egg substitute “Just Egg”:

Best for:
Increasing your story’s discoverability
Getting more views and engagement on your stories
Highlighting your branded hashtags, hashtag campaigns, and more!
Instagram Stories Stickers #8: Music Stickers
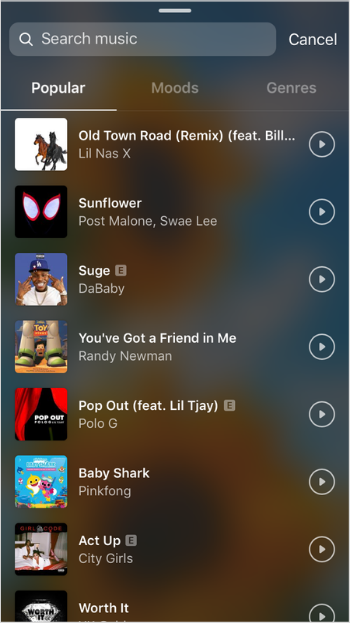
The music sticker on Instagram Stories works for both videos and photos and lets you select from thousands of music tracks that fit the mood of your story — everything from Stevie Wonder to Billie Eilish.
This sticker doesn’t have as much of business use as the others, but it’s still a great way to drum up engagement on your Instagram Stories.
Check out how @elisedarma used the sticker to spice up her story:
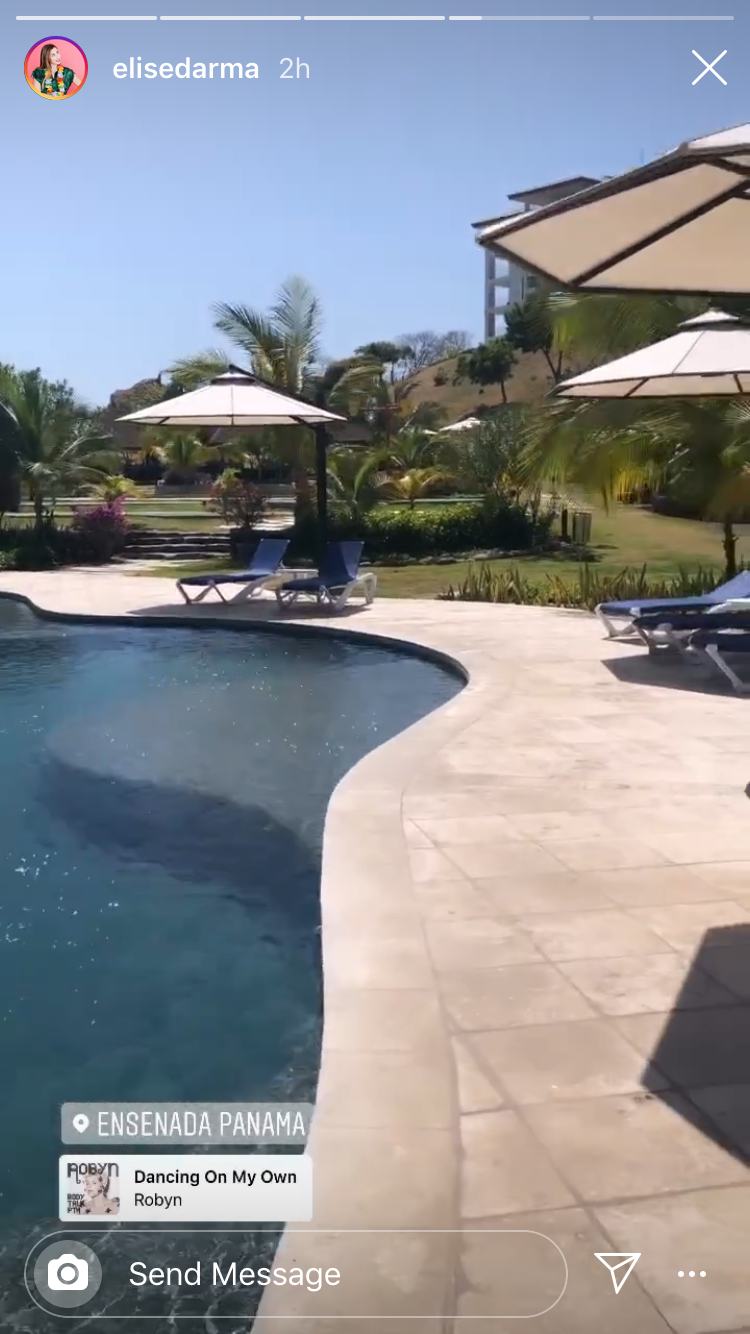
The great thing about the music sticker is that you have thousands of songs to choose from! You can search for a specific song, or you can browse by mood, genre, or what’s popular.
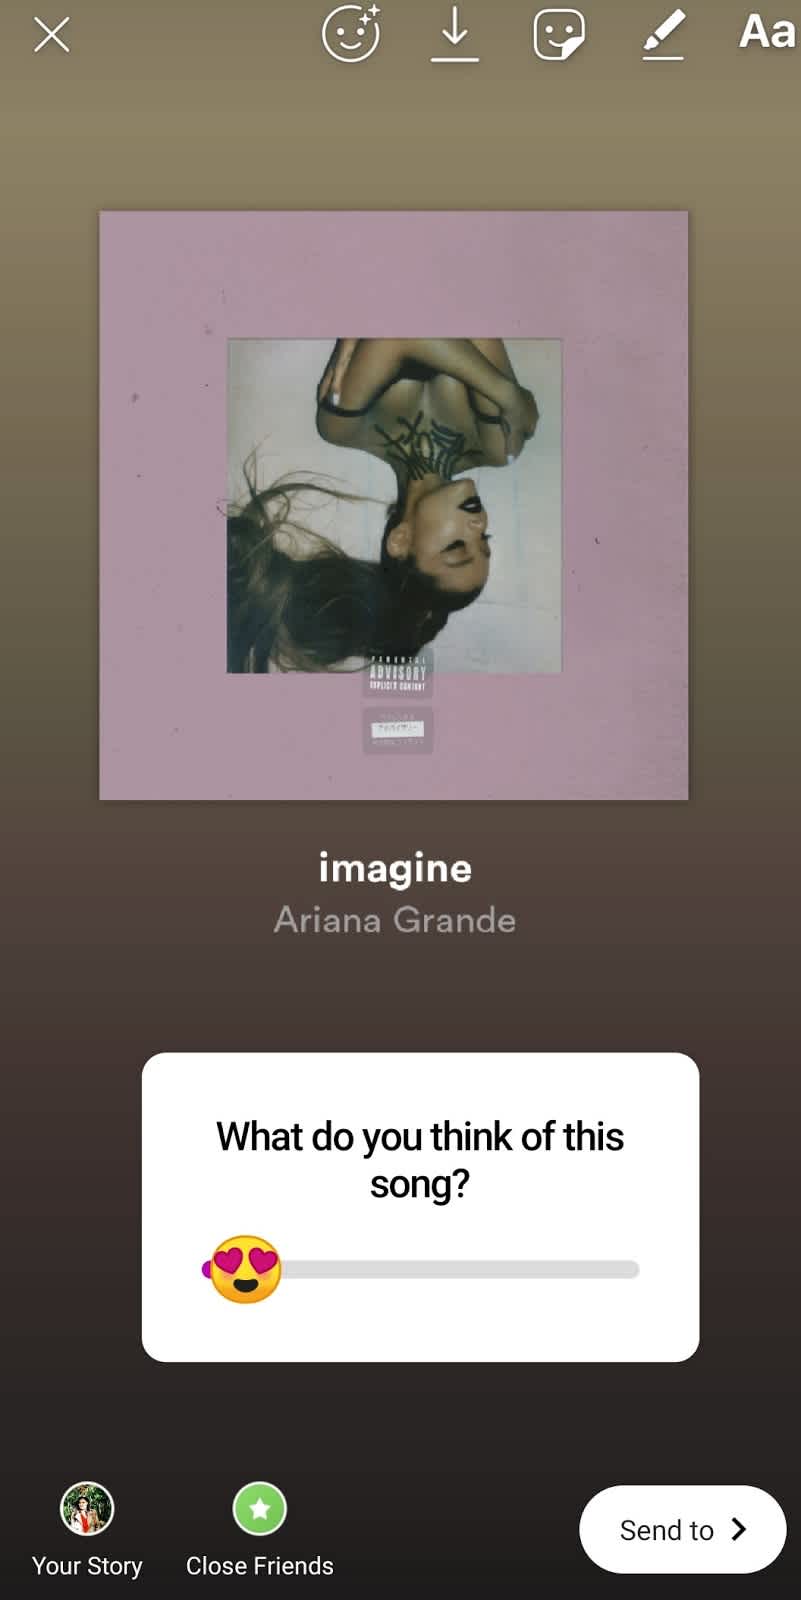
You can also pinch the sticker to make it really small if you don’t want it to interfere with the look or aesthetic of your story:
Best for:
Creating engaging content
Elevating your content to fit a specific mood
Instagram Stories Stickers #9: GIF Stickers
If you’ve been looking for ways to create content that’s more attention-grabbing and engaging, using Instagram GIF stickers might be the answer.
In 2018, Instagram teamed up with GIPHY to build a library of high-quality GIFs on Instagram Stories. Now you can add fun, expressive GIF stickers to any photo or video in your story. And there are just so many use cases for businesses!
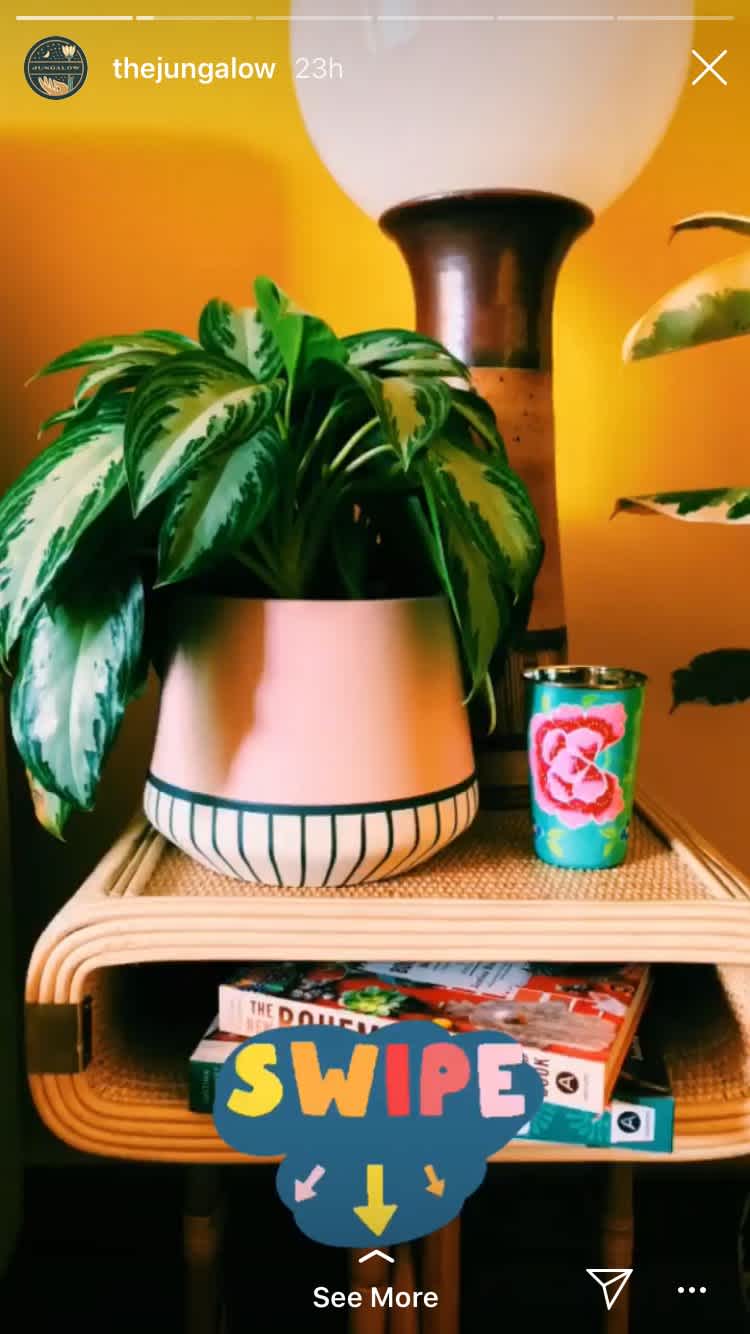
Whether you’re looking to upgrade your product shots, highlight your links and call-to-actions, promote your campaigns, or just add some personality to your stories, we guarantee there’s a GIF sticker that can help you out!
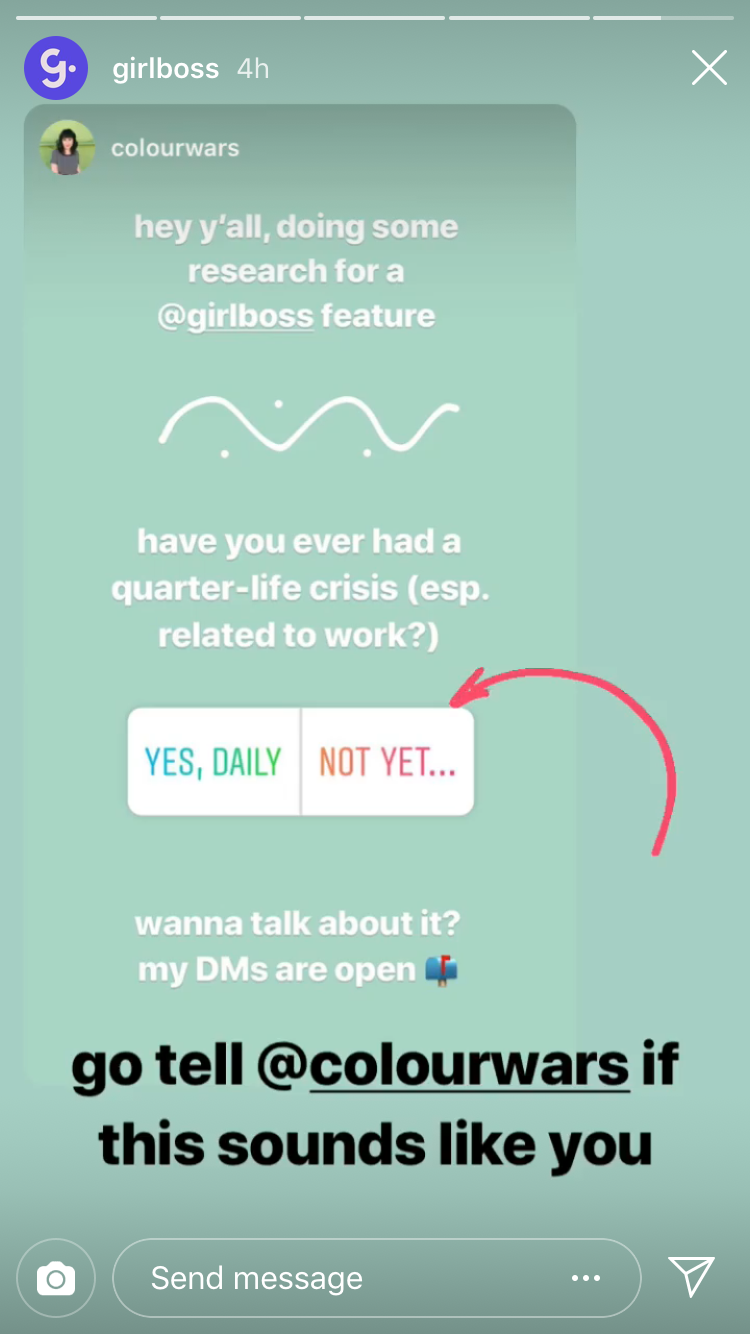
Check out how @girlboss uses a GIF sticker to draw attention to their Instagram Stories poll:
You can also create your own custom GIFs for Instagram Stories, which is a great growth hack because other accounts will be able to search and post with your GIFs on their own stories!
Check out how @ritual created its own set of branded GIFs on Instagram Stories to give their customers a new way to share user-generated content (UGC):
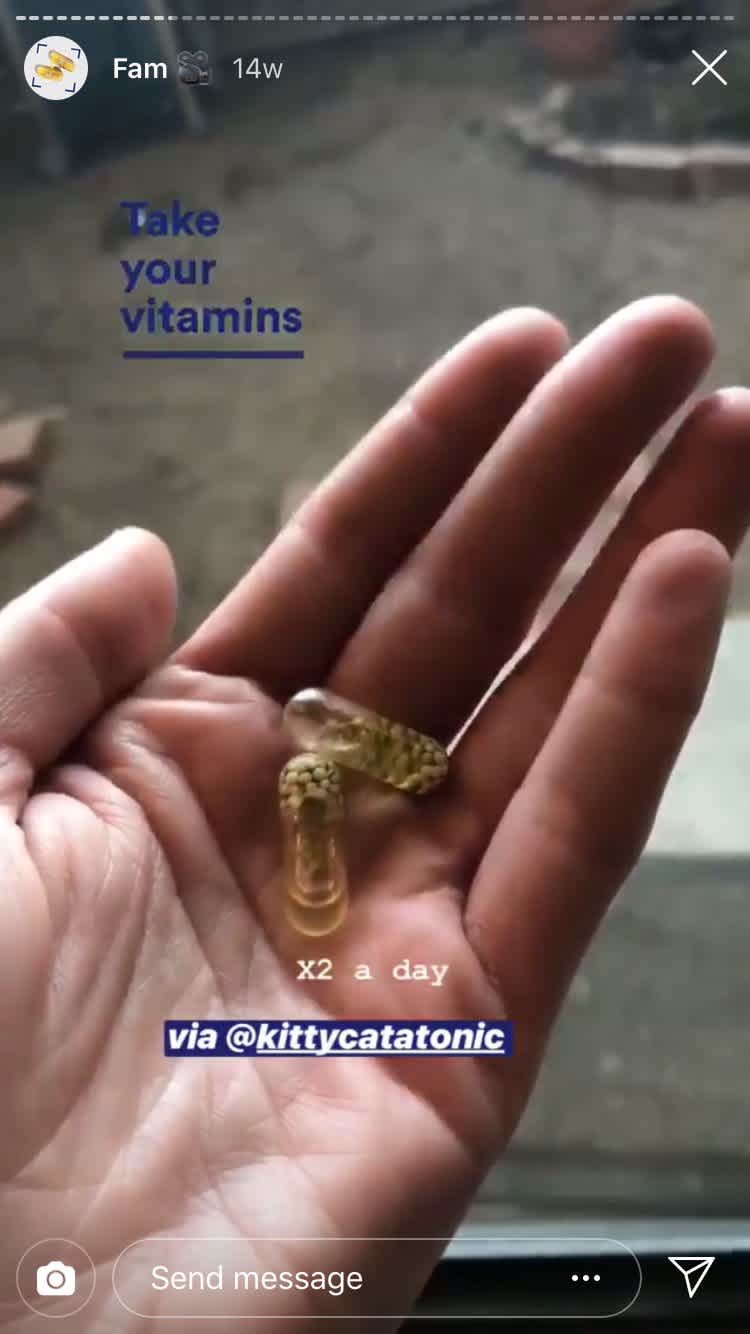
In total, Ritual has created nearly a dozen different GIFs on Instagram Stories, including GIFs of their products, slogans, and logo. All you have to do is search “ritual” when adding a GIF to your story, and you can quickly find them in the library!
Best for:
Adding a visual flair to your stories
Highlighting your links & CTAs
Driving brand awareness
Instagram Stories Stickers #10: Poll & Emoji Slider Stickers
Have you ever wanted to survey your Instagram audience about their interests, likes, dislikes, and more? Then you should consider using Instagram’s poll sticker or emoji slider in your next story.
When you share a poll sticker, you can ask your audience a question and see the results as they vote. Emoji sliders are similar but rather than voting “yes/no,” viewers can drag the slider left or right to submit their response.
The great thing about these two Instagram Stories stickers is that there are so many business uses!
Whether you want to collect feedback on your products, crowdsource ideas, or simply entertain your followers, they’re a great way to engage with your Instagram audience and gather valuable information.
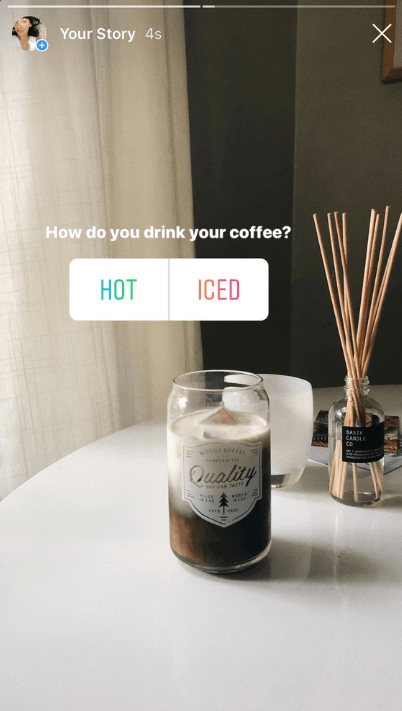
Check out how @hubspot uses poll stickers to quiz their audience about current events in the tech world:

You can also get creative with the emoji slider Instagram Stories sticker, by adding different numbers alongside of the poll and having your followers guess answers to your questions or indicate a level of preference.
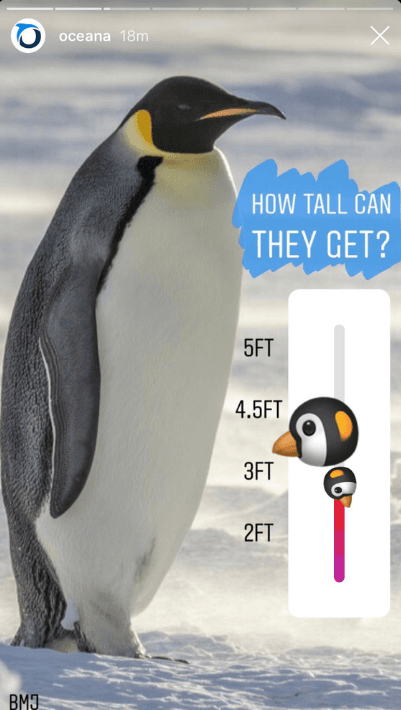
Keep in mind that when you use polls in your Instagram marketing strategy, it’s important to not only ask the right questions but also let your audience know you’re listening. Once your Instagram Stories poll is complete (after 24 hours), don’t forget to share the results!
Best for:
Crowdsourcing ideas and gathering feedback
Learning more about your audience
Creating engaging content
Instagram Stories Stickers #11: Question Stickers
Unlike poll stickers and emoji sliders, both of which allow users to “vote” on questions that you submit, when you add a question sticker to your Instagram story, other users submit questions for you to answer. So basically, it puts your followers in the driving seat!
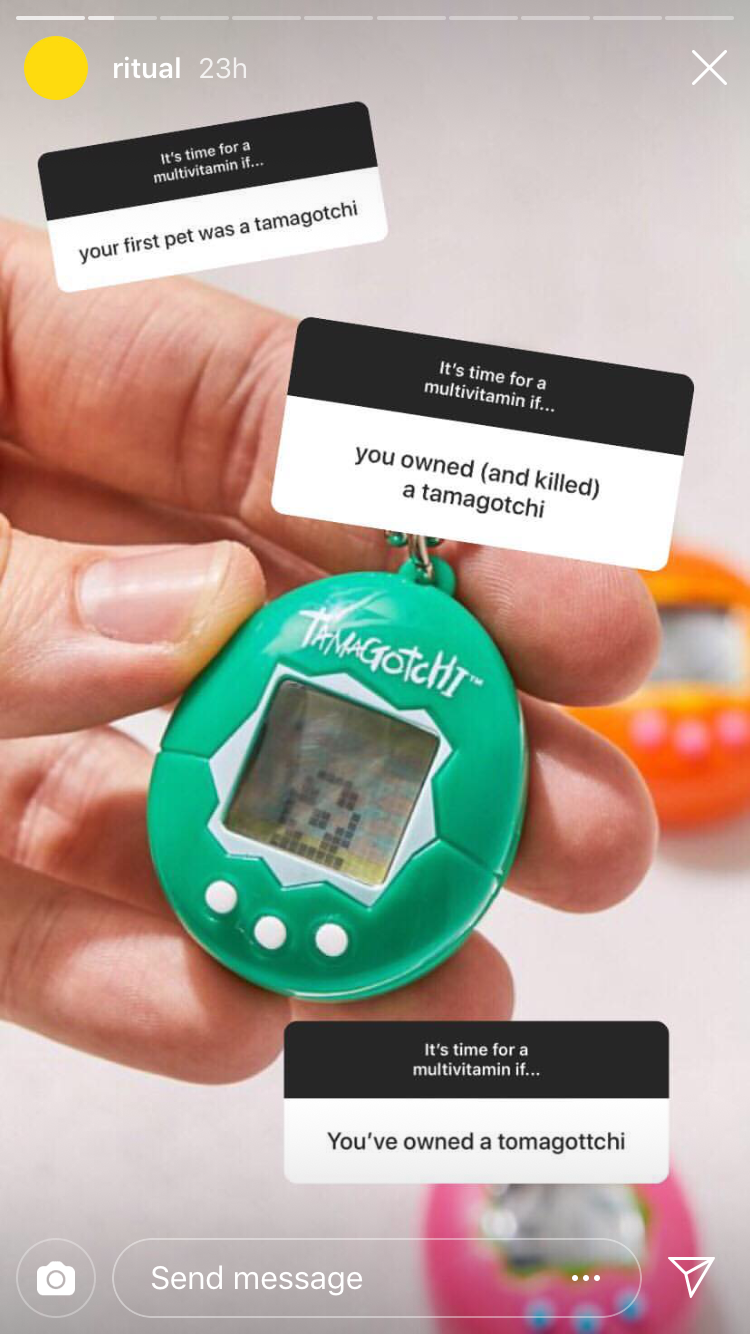
Again, there are so many different ways that businesses can use question stickers in their stories. For example, if you’re planning an Instagram Stories takeover, you can use the question sticker to gather your audience’s most pressing questions beforehand.
You can also use question stickers simply to start a conversation with your followers, like @thepouf did recently:
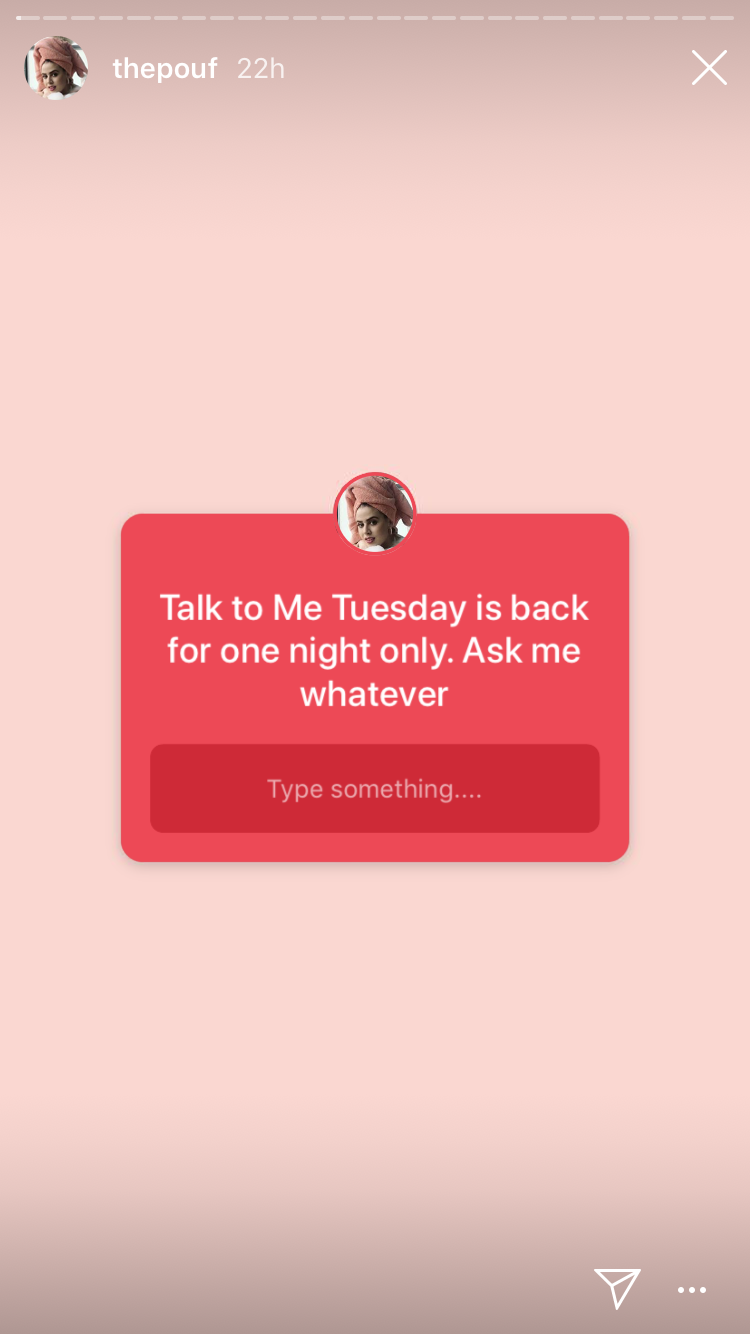
Question stickers are a great opportunity to show your followers you’re approachable and that there’s a real human behind your account. You can ask for advice or give them the chance to discuss their thoughts — whatever helps you engage with your audience on a deeper level.
Best for:
Crowdsourcing ideas and gathering feedback
Learning more about your audience
Creating engaging content
Instagram Stories Stickers #12: Countdown Stickers
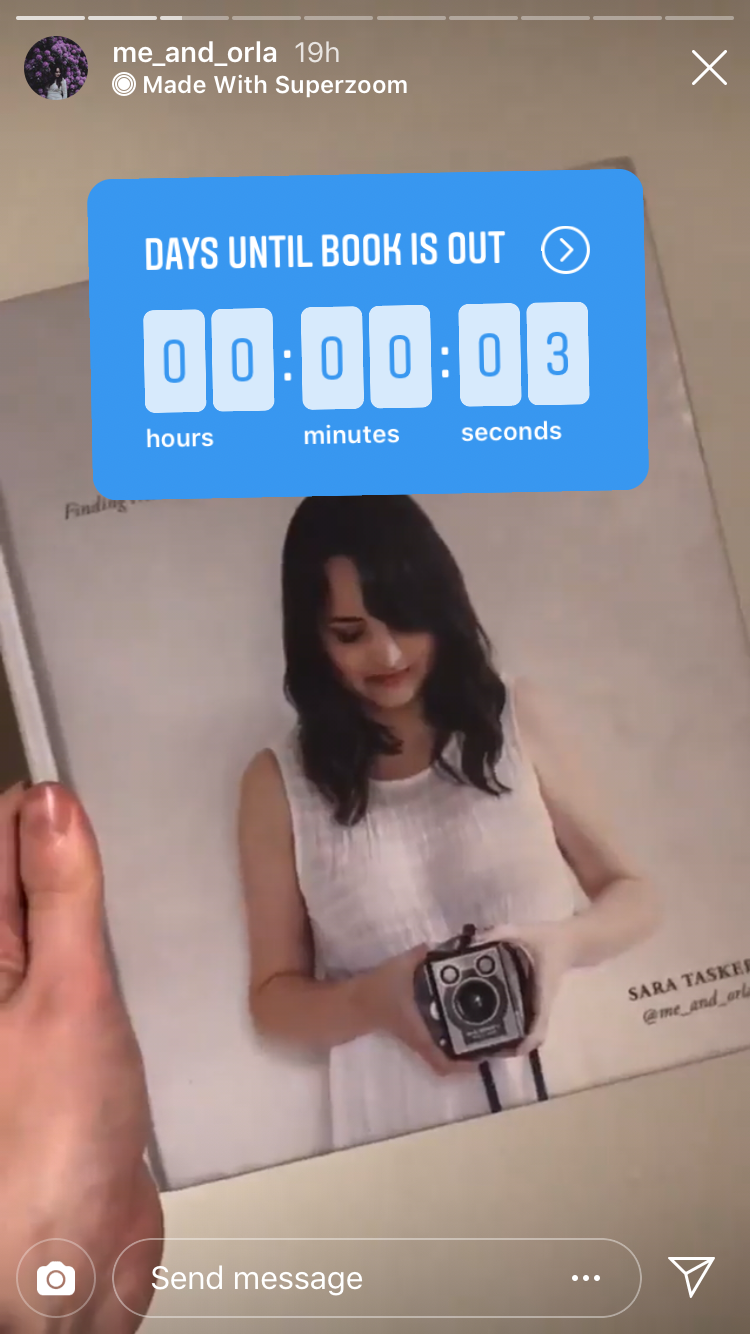
If you’re sharing a story about an upcoming special occasion (like an in-store sale, product launch, or event), you can add a sticker that counts down to a date and time that you set.
Your followers can then subscribe to your countdown event, which will send them a reminder when the time is up and your countdown is complete!
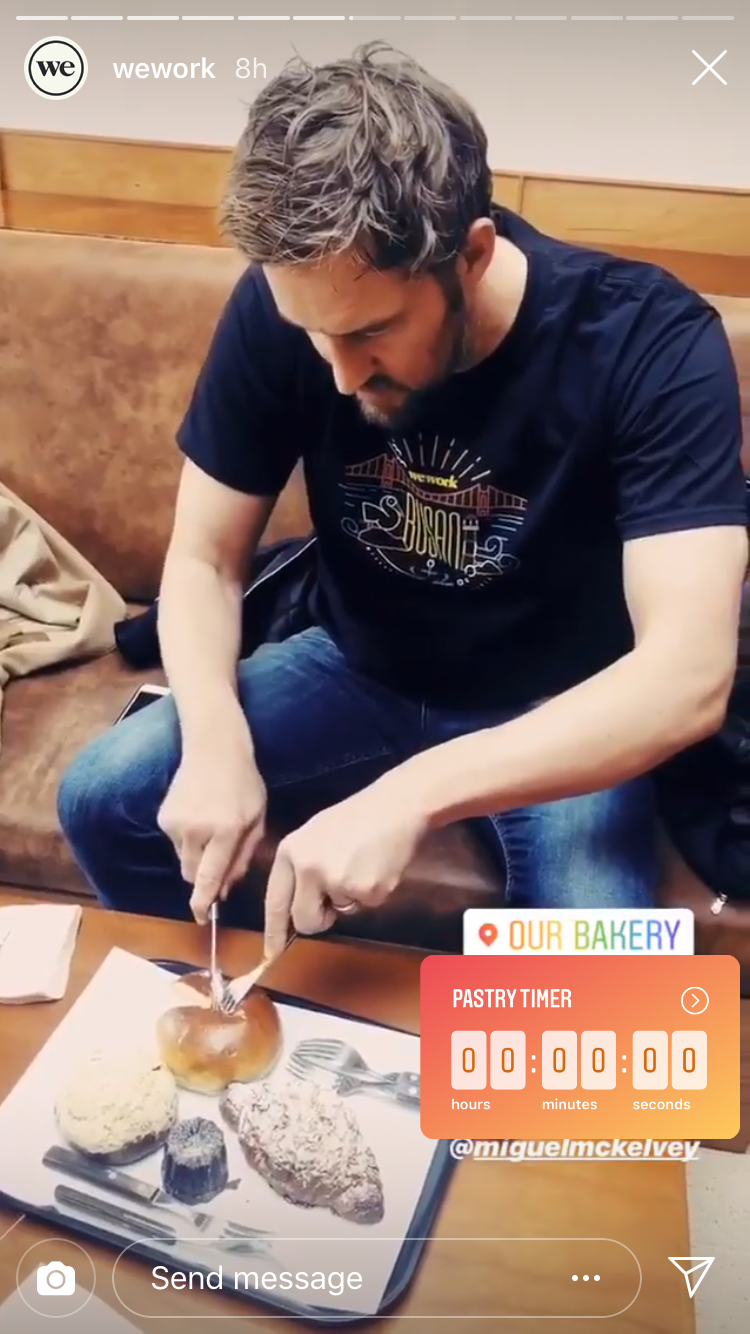
This is great for promoting your sales, events, and product launches — like @me_and_orla did to promote her book:
Or how to get your audience excited about an announcement, like @hersfirst:
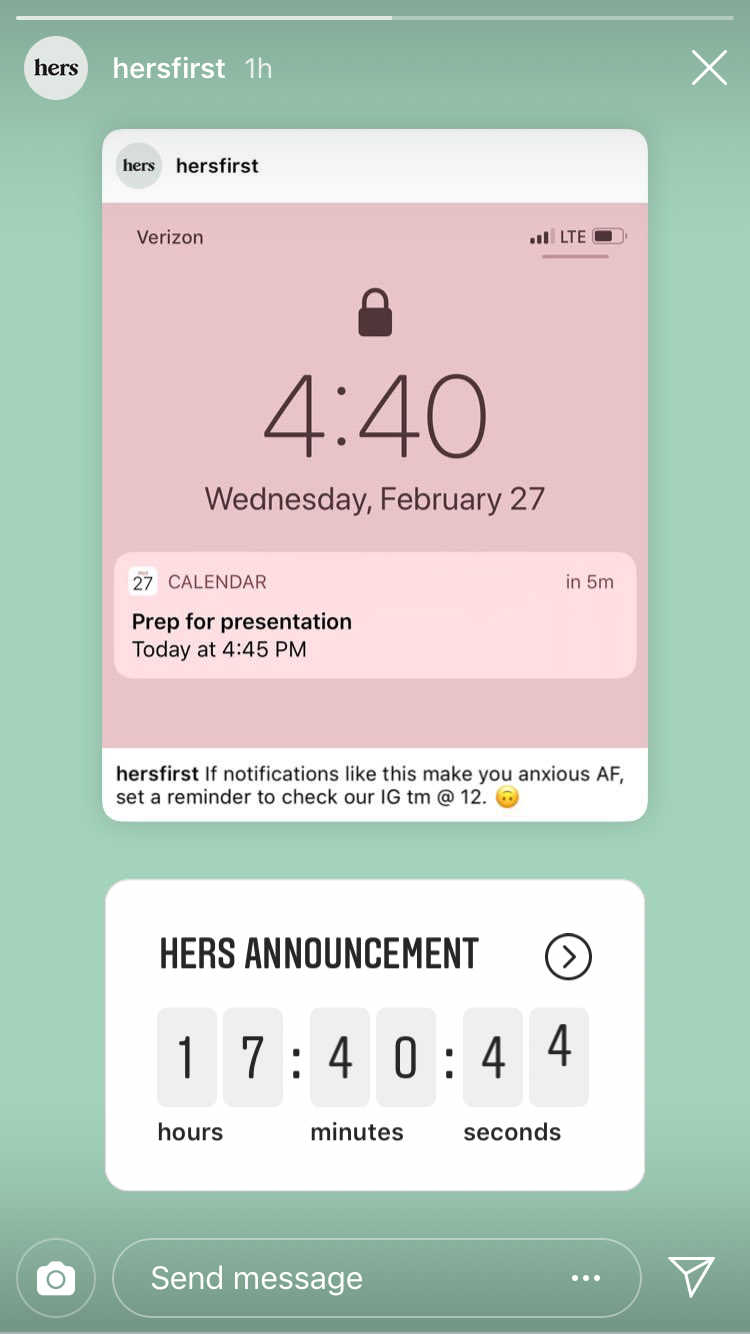
Whatever you’re counting down to, the ability to share a countdown on your stories and nudge your followers about it with a reminder, is a great way to generate better results.
Best for:
Promoting a time-sensitive campaign
Generating interest in a product launch
Instagram Stories Stickers #13: Shopping Stickers
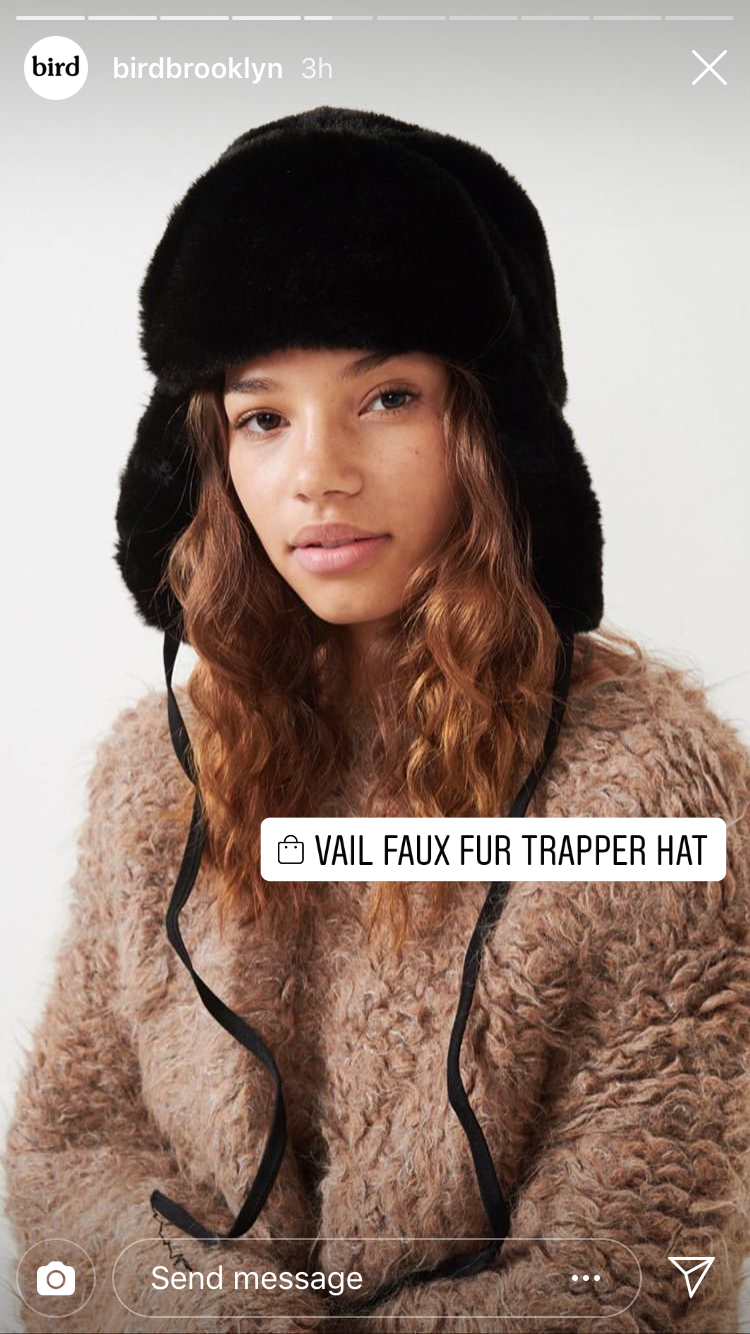
Tagging your products with Instagram’s shopping stickers is a great (and organic) way to promote shopping on stories because you can showcase product details without coming across as too sales-y or spammy.
And the great news is that unlike Instagram Stories swipe-up links, you don’t need to be verified or have 10,000 followers to use them!
Check out how @birdbrooklyn uses shopping stickers to promote a new product line:
Or how @benefitcosmetics inserts a shopping sticker in a product tutorial to make it easy for viewers to shop while they learn:
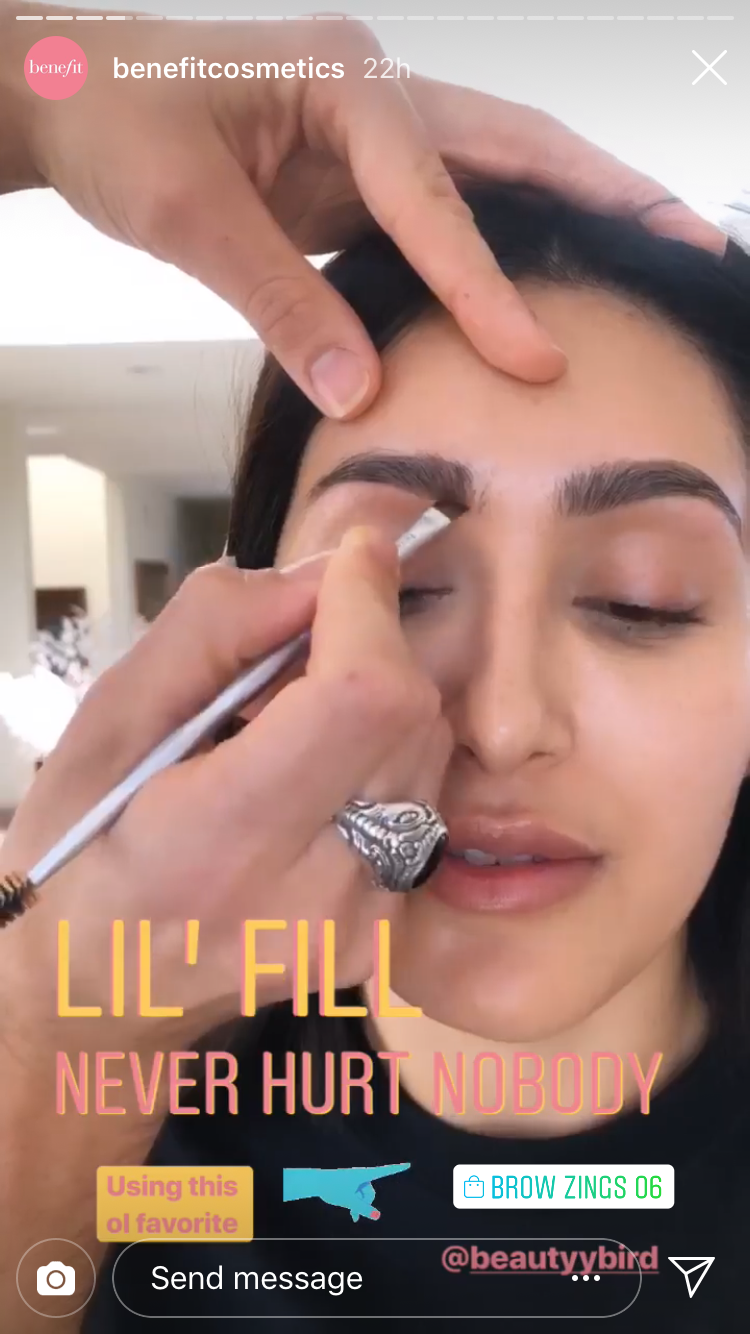
There’s less room for creativity when it comes to shopping stickers compared to other stickers on Instagram Stories, but they’re hugely beneficial if you’re an e-commerce brand. Just be wary of not over-using the shopping sticker in your stories!
Best for:
Promoting products on Instagram Stories
Generating sales
And that wraps up some of the best Instagram Stories stickers that are perfect for engaging with your audience, adding an element of fun, and growing your business on Instagram!
Hopefully, this post gives you all the inspiration you need to start using Instagram Stories stickers more effectively for your business!
Want to learn how to use your Instagram Stories to grow your business and get more followers? Sign up for our free Instagram Stories course and take your Instagram Stories to a whole new level!
